Resize a Video for Any Platform Without Losing Quality

Learn how to resize a video for social media, streaming, and more. Our guide covers aspect ratios, resolutions, and the best tools to maintain perfect quality.
When you resize a video, you're essentially changing its dimensions to fit a specific container. This could mean adjusting its resolution (the number of pixels) or its aspect ratio (the shape of the frame) to look right on platforms like TikTok or Instagram. Getting this right is the difference between content that looks polished and professional, and something that just looks broken.
Why You Can't Ignore Video Dimensions
Thinking you can just upload the same video file everywhere is a classic rookie mistake. In reality, getting your video dimensions right is one of the most fundamental steps to engaging an audience. Each platform has its own rules and its own 'feel', and a one-size-fits-all video just screams that you don't understand the space you're in.
It all comes down to the viewing experience. We've all seen it: a vertical video shoehorned into a horizontal YouTube player, with massive, ugly black bars on either side. It wastes a huge amount of screen real estate. The reverse is just as bad. Imagine a beautiful widescreen film uploaded to TikTok or Instagram Reels; the platform will brutally crop the sides, likely cutting out the most important parts of the shot and leaving viewers confused.
This kind of friction, however small, is often enough to make someone instantly scroll on.
The Strategic Pay-Off of Perfect Sizing
This isn't just about making things look pretty. There's a real, strategic advantage to correctly sized videos. For starters, files that are properly dimensioned and compressed are smaller, meaning they load faster. That's a huge deal for anyone watching on a mobile connection, which is most of your social media audience.
In a hyper-competitive space, every little detail counts. Take the UK video streaming market, which pulled in around $13.9 billion in revenue this year. With live streaming making up more than 76% of that figure, consumers expect a flawless, instant-loading experience on any device they own. In a market that mature, the ability to resize a video properly isn't a bonus—it's a baseline technical skill. You can read the full research on the UK's streaming market for more on that.
The Bottom Line: Resizing isn't a chore; it's a sign of respect for the platform and the viewer. A perfectly sized video feels native and professional, which immediately makes it more credible.
Ultimately, you need to see resizing as a core part of your content strategy, not an afterthought. It’s what separates professional creators who get it from amateurs who are just throwing content at the wall to see what sticks. If you want to connect with people, start by getting the frame right.
Understanding the Language of Video Dimensions
Before you dive into resizing a video, it’s worth getting a handle on the terminology. You need to speak the language. If you get these core concepts wrong, you’re on the fast track to a distorted, pixelated mess that just looks unprofessional.
The two big ones you’ll hear constantly are resolution and aspect ratio. People often use them interchangeably, but they are completely different things.
Think of resolution as the raw detail packed into your video. It’s the total number of pixels measured as width by height—for example, 1920x1080 pixels, which you probably know as 1080p or Full HD. The higher the resolution, the sharper and clearer your picture will be. Simple as that.
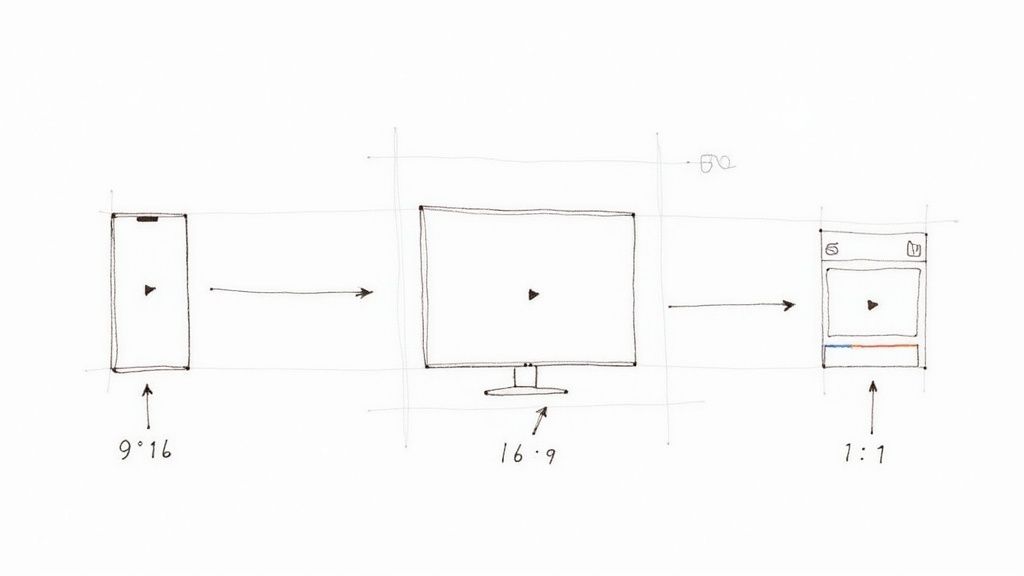
Aspect ratio, on the other hand, is all about the shape of the frame. It’s the relationship between the video's width and its height. A sweeping cinematic film might be shot in a wide 21:9 aspect ratio, your standard YouTube video is 16:9, and an Instagram Story is a tall, vertical 9:16. When you change the aspect ratio, you’re literally changing the shape of your canvas.
To make things easier, here’s a quick cheat sheet for the most common social media platforms. Getting these right from the start saves a ton of headaches later.
Quick Guide to Social Media Video Specs
Use this cheat sheet to find the ideal aspect ratio and resolution for the most popular social media platforms.
| Platform | Placement | Aspect Ratio | Recommended Resolution |
|---|---|---|---|
| Feed Post | 1:1 (Square) or 4:5 (Portrait) | 1080x1080 or 1080x1350 | |
| Stories/Reels | 9:16 (Vertical) | 1080x1920 | |
| TikTok | For You Page | 9:16 (Vertical) | 1080x1920 |
| YouTube | Standard Video | 16:9 (Widescreen) | 1920x1080 (or higher) |
| YouTube | Shorts | 9:16 (Vertical) | 1080x1920 |
| X (Twitter) | Timeline Video | 16:9 (Landscape) or 1:1 (Square) | 1280x720 or 720x720 |
| Feed/Stories | 4:5 (Portrait) or 9:16 (Vertical) | 1080x1350 or 1080x1920 | |
| Feed Video | 16:9 (Landscape) or 1:1 (Square) | 1920x1080 or 1080x1080 |
Keep these numbers handy. They're your starting point for creating video that looks native and professional on each platform.
Scaling vs Cropping: What’s the Difference?
Once you know your target dimensions, you have two main ways to get there: scaling and cropping.
Scaling is about changing the resolution while keeping the aspect ratio locked. For example, if you take a massive 4K video and downscale it to 1080p, you’re reducing the pixel count but the 16:9 shape stays the same. This is what you do when you need to make a file smaller for the web without altering its composition.
Cropping is much more aggressive. You're physically chopping off parts of the video frame to force it into a new shape. A classic example is taking a 16:9 landscape video and turning it into a 9:16 vertical clip for TikTok. To do that, you have to slice away the sides of the original footage.
So, which one should you use? It all comes down to your goal. Scaling is for adjusting size. Cropping is for completely reframing the action to fit a different-shaped screen.
Keeping Your Quality in Check: Bitrate and Codecs
Finally, let's touch on two things that have a massive impact on your final video quality and file size: bitrate and codecs.
The bitrate is essentially the amount of data used to encode each second of your video. A higher bitrate means more data, which translates to better quality but also a much larger file. A low bitrate saves a ton of space, but if you go too low, you’ll start seeing nasty compression artefacts like blockiness and pixelation.
This data gets packaged up using a codec—an algorithm that compresses and decompresses video. You’ve almost certainly come across H.264 (AVC), which is the workhorse of the internet due to its incredible compatibility. But the industry is shifting towards its successor, H.265 (HEVC). It offers roughly 50% better compression, which means you can get the same visual quality at half the file size. For anyone streaming high-res video, that’s a game-changer.
Why does this technical stuff matter so much? Because in a hyper-connected country like the UK, where internet penetration is at 97.8%, viewers have zero patience for poor quality. People expect flawless HD and 4K streaming on demand. To deliver that experience over both high-speed broadband and 5G, you have to be smart about how you resize your video to adapt to different connection speeds. You can learn more about how the UK streaming market drives resizing needs.
With these fundamentals under your belt, you’re ready to tackle any resizing task with confidence. You now know exactly which levers to pull to get the perfect result for any screen.
Practical Ways to Resize a Video
Now that we've covered the theory, let's get our hands dirty. There are a few fantastic ways to resize a video, and the best one for you really depends on what you're trying to do and how comfortable you are with different tools. A quick social media clip, for instance, needs a totally different approach than a batch of 100 marketing videos.
The key is to match the tool to the task. Let's walk through the most common and effective options.
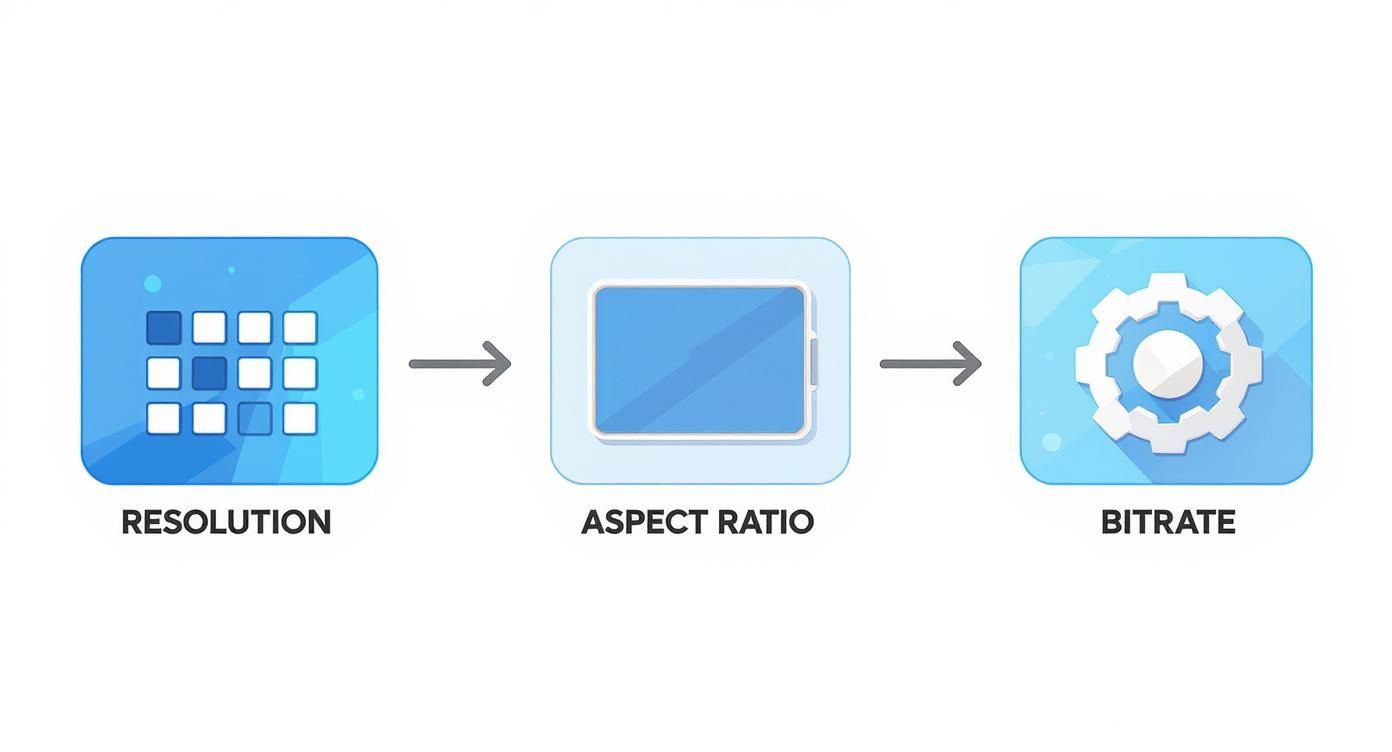
This diagram gives you a quick visual reminder of how resolution, aspect ratio, and bitrate all work together to define your final video.
Using User-Friendly Desktop Software
For most day-to-day resizing jobs, a free desktop app like HandBrake is the perfect place to start. It strikes a great balance between control and simplicity, hiding all the complicated stuff behind a clean, intuitive interface. It's my go-to for one-off tasks or small batches of files.
Let's imagine a common scenario: you've got a standard 16:9 landscape video you filmed for YouTube, but now you want to repurpose it for an Instagram Story. Here's how you'd do it in HandBrake:
- Load your video: Just open HandBrake and drag your source file into the window.
- Set new dimensions: Head over to the "Dimensions" tab. You'll want to untick "Keep Aspect Ratio" and then manually type in 1080 for the width and 1920 for the height.
- Check the framing: Because you're changing the video's fundamental shape, some of the original shot will inevitably be cropped out. The preview window is your best friend here—use it to see what's getting cut. If the main subject is off-centre, you might need a proper video editor to reframe the shot properly.
- Pick a preset: In the "Video" tab, select a high-quality preset like "Fast 1080p30" as a solid starting point. This is also where you can tweak the bitrate if you're trying to hit a specific file size or quality level.
- Export your work: Click "Start Encode," and you’ll soon have a perfectly formatted vertical video ready for Instagram.
This hands-on method is a brilliant way to get a feel for how resizing works without getting bogged down in technical jargon.
For the Power Users: The FFmpeg Command Line
When you need surgical precision, automation for lots of files, or just want to feel like a video wizard, nothing comes close to FFmpeg. It's a free, open-source command-line tool that can handle pretty much any video task you can think of. It doesn't have a friendly graphical interface, but what it lacks in looks, it more than makes up for in raw power.
Here are a couple of copy-and-paste commands for common resizing tasks. All you need to do is open your terminal (or Command Prompt on Windows), navigate to the folder where your video is, and run them.
My one crucial tip: Always, and I mean always, work on a copy of your original file. One tiny typo in an FFmpeg command can permanently overwrite your source video. It's a simple safety step you'll be glad you took.
Example 1: Simple Scaling
Let's say you want to shrink a 4K (3840x2160) video down to 1080p (1920x1080) to reduce the file size, while keeping the aspect ratio the same. This is the command you'd use:
ffmpeg -i input.mp4 -vf "scale=1920:1080" output_1080p.mp4
Example 2: Cropping to a Vertical Aspect Ratio
To turn a landscape 1920x1080 video into a vertical 1080x1920 clip for TikTok, you'll need to crop it. This command neatly crops out the centre portion of your video:
ffmpeg -i input.mp4 -vf "crop=1080:1920" output_vertical.mp4
Getting comfortable with a few basic FFmpeg commands can seriously speed up your workflow. For more advanced tricks and ideas, you can always explore other guides on the SoReel blog.
Quick Edits on Your Mobile
Sometimes you just need to get something resized and posted while you're out and about. This is where mobile apps like CapCut or InShot really shine. They're built from the ground up for social media workflows and make resizing for platforms like Instagram or TikTok an absolute breeze.
In CapCut, for example, you can import a clip, tap "Format," and instantly pick the 9:16 aspect ratio. The app automatically adjusts the frame, and you can simply pinch and zoom to reposition your subject perfectly before hitting export. It's by far the fastest way to handle a single clip on the fly.
The demand for these skills is exploding. In the UK, the video production market hit a value of USD 5.8 billion last year and is projected to grow at an astonishing rate of over 27% annually. As production volumes go through the roof, the need for efficient resizing tools and workflows becomes more critical than ever. You can discover more insights about the booming UK video production market and its technical demands.
How to Resize a Video Without Losing Quality
The biggest fear when resizing a video? Ending up with a blurry, pixelated mess. It’s a completely valid concern. Poor resizing can absolutely ruin great footage, but losing quality isn't a given—it’s usually just a sign that the wrong settings were used.
With the right approach, you can keep the crispness and clarity of your original clip locked in.

The secret ingredient here is bitrate. Think of bitrate as the amount of data your video is allowed to use for each second of footage. If this data budget is too low for the resolution, the software has to get aggressive with compression. That’s what creates those ugly artefacts like blockiness and blur.
When you’re downscaling—making a video smaller—you can lower the bitrate, but it has to be done proportionally. A good rule of thumb is to halve the bitrate when you halve the resolution. For instance, if your 4K video has a bitrate of 50 Mbps, a 1080p version will probably look great somewhere around 10-15 Mbps. Whatever you do, don't just click the default "low quality" preset; they're often far too aggressive.
Choose Your Codec Wisely
The codec you use to package your video also has a massive impact on quality. For years, H.264 (AVC) has been the workhorse of the industry, but modern codecs can do the same job much more efficiently.
The new king of the hill is H.265 (HEVC). It’s roughly 50% more efficient than its predecessor, meaning it can deliver the same visual quality at half the file size. This efficiency gives you two powerful options:
- Smaller Files: Match the quality of an H.264 export but with a much smaller file, which is perfect for faster web loading.
- Higher Quality: Keep the file size the same as an H.264 export but pack in significantly more visual detail.
For any project where quality is a top priority, simply choosing H.265 is one of the easiest ways to get a better result.
Advanced Encoding for Maximum Clarity
If you need the absolute best quality possible, especially for a flagship piece of content, it’s worth looking into two-pass encoding. Most standard exports use a single-pass method where the software analyses and compresses the video all in one go.
Two-pass encoding, on the other hand, is much smarter.
- First Pass: The software scans the entire video, mapping out which scenes are simple (like a talking head) and which are complex (like a fast-action sequence with lots of movement).
- Second Pass: It then uses this map to intelligently allocate your bitrate budget. More data is assigned to the complex parts that need it, while less is used for the simple parts. The result is a far more efficient and higher-quality final video.
This process takes longer, sometimes twice as long, but the improvement in quality can be substantial. It's the technique professionals use when they simply can't compromise on the final look.
The Power of AI Upscaling
But what if you need to go the other way and make a small video larger? Traditionally, this would just stretch the existing pixels, resulting in a soft, blurry image. This is where AI upscaling tools like SoReel have completely changed the game.
Instead of just making pixels bigger, AI algorithms intelligently analyse the footage. They identify edges, textures, and patterns, then use that data to generate new, realistic detail. This allows you to take a 720p or 1080p clip and upscale it to 4K with astonishing clarity. For restoring old footage or improving a low-resolution source, AI is the only way to resize a video upwards without a major quality sacrifice.
Automating Your Video Resizing Workflow
If you’re a creator or run a business with a constant flow of video content, you know the drill. Manually resizing every single file is a huge time-sink. It’s slow, repetitive, and honestly, a terrible use of your time. As soon as you start dealing with more than a handful of videos, you have to think about automation.
The whole point is to work smarter, not harder. Moving from a manual process to an automated one frees you up to handle the creative side of things instead of getting bogged down in technical chores. This is where you’ll see massive productivity gains, especially if you’re juggling several social media accounts.
Batch Processing with a Simple Script
One of the most straightforward ways to get started with automation is batch processing. This is a lifesaver when you find yourself applying the exact same resizing rules to a big pile of files. Instead of opening each video one by one, a simple script can chew through an entire folder for you.
For anyone who’s comfortable on the command line, FFmpeg is your best friend here. You can whip up a short script that loops through every video in a directory and applies your chosen resizing command. Imagine a script that takes a folder full of 4K landscape videos and automatically spits out a 9:16 vertical version for each one, neatly organised in a new output folder.
This is an absolute game-changer for repurposing content. Think about taking an entire library of YouTube videos and creating TikTok-ready clips from all of them with a single command. That’s the real power of batch processing.
Cloud APIs for Seamless Integration
For bigger teams or developers building their own apps, you’ll probably need something a bit more powerful. This is where cloud-based video APIs enter the picture. These services let you plug video processing directly into your existing digital workflows, creating a system that runs entirely on its own.
A common setup usually looks something like this:
- Upload Trigger: A user uploads a master video file to your platform or server.
- API Call: That upload automatically triggers a call to a video processing service API.
- Automated Resizing: The service then takes over, generating multiple versions of that video based on your rules—a 16:9 for YouTube, a 1:1 for an Instagram feed post, and a 9:16 for Reels, all done in the background.
This kind of setup guarantees that every video is instantly optimised for every channel you post to, with zero manual effort.
The Rise of AI-Powered Automation
The next step in this evolution is automation driven by AI. Platforms like SoReel go beyond simple resizing by also automating the intelligent reframing of your content. So, instead of just blindly cropping to the centre of the frame, the AI can actually identify the main subject—like a person speaking—and make sure they stay perfectly in view in the new aspect ratio.
This kind of smart automation can handle complex edits that used to require a human editor sitting in front of a screen. For any business that needs to resize videos at scale, the efficiency savings are massive. If you're managing a high volume of content, checking out the different SoReel plans can show you exactly how AI-powered batch processing and API access could slot right into your production pipeline.
Common Video Resising Questions Answered
When you start resising videos, you'll inevitably hit a few snags. It happens to everyone. Let's walk through some of the most common questions and give you some straight, practical answers to get you moving again.
What's the Quickest Way to Resize Just One Video?
If you've got a single clip you need to get onto Instagram right now, your phone is probably the fastest tool you have. An app like CapCut is designed for exactly this. You can literally drop your video in, tap 'Format,' pick the 9:16 ratio for a Reel or Story, and have it exported in less than a minute.
But what if you're doing this all the time? That manual, one-by-one process quickly turns into a major time sink. Taking an hour to learn a desktop tool like HandBrake or putting together a basic FFmpeg script will genuinely save you countless hours down the road.
Can I Make My Blurry Video Look Like it Was Shot in 4K?
This is a big one. Can you take low-resolution footage and make it look pristine? Well, you can't invent detail that the camera never captured in the first place. That said, modern AI upscaling software gets astonishingly close. These tools don't just stretch pixels; they intelligently analyse the footage to sharpen edges, reconstruct textures, and fill in the gaps.
While it won't be a perfect substitute for a native 4K recording, AI upscaling is light years ahead of traditional methods and is absolutely the best way to breathe new life into older or smaller videos.
Pro Tip: If your video looks blurry or blocky after you’ve resized it, the culprit is almost always the bitrate. Think of bitrate as the data budget for each second of video. If it’s too low for the new, larger resolution, the quality tanks. As a rule of thumb, 8-12 Mbps is a great starting point for crisp 1080p footage.
For more technical deep-dives and specific troubleshooting, feel free to check out our comprehensive FAQ section.
Ready to resize, upscale, and perfect your videos without the headache? SoReel uses powerful AI to enhance your footage in a single click, delivering studio-grade results in minutes. Try it for free today.