A Practical Guide to Remove Object from Video

Learn how to remove object from video using AI and pro editing techniques. Our practical guide offers actionable steps for clean, professional results.
Ever filmed a shot that was almost perfect, except for one distracting detail? Maybe a stray coffee cup on a desk, or someone unexpectedly walking through the background. It’s a common frustration, but thankfully, getting rid of unwanted objects is more achievable than ever.
The real question is, which path do you take? Do you go for a fast, AI-driven solution that gets the job done in minutes, or do you roll up your sleeves with precise, manual editing techniques for absolute control? Your choice really boils down to the complexity of the shot and how polished you need the final result to be.
The Modern Challenge of Removing Unwanted Objects
Wanting a clean, distraction-free shot isn't just a professional obsession; it's a fundamental part of good storytelling. The ability to cleanly erase something from a video is a powerful skill for everyone, from a social media manager editing a quick reel to a VFX artist meticulously crafting a cinematic scene.
This guide will walk you through the two main ways to tackle this. Getting your head around these approaches from the start is key, as they represent a classic trade-off between speed and precision. Knowing which one to pick for the job at hand will save you a world of headaches down the line.
Choosing Your Method: AI vs. Manual
So, how do you decide? It all comes down to what you’re trying to remove and the footage you’re working with.
AI-Powered Tools: These are your best friend for simpler jobs. Think of removing a static logo from a wall or a person standing still in the background of a steady shot. The software analyses the surrounding pixels and automatically fills in the gap.
Manual Techniques: When things get tricky—like in scenes with moving cameras, complex backgrounds, or objects that pass in front of other elements—you'll need the control that manual methods offer. Tools like Adobe After Effects are the industry standard for this kind of detailed work.
This is more than just a creative choice; it’s a critical skill in a booming industry. The UK’s post-production sector alone was worth around USD 5.9 billion in 2023 and is only set to grow. This massive commercial demand highlights just how valuable advanced editing skills have become. You can read more about the growth of the UK's video production market to see where things are heading.
Deciding between automation and hands-on control is the first, and most important, step. To make it easier, let's break down the pros and cons.
Choosing Your Method: AI vs. Manual Object Removal
This quick comparison should help you decide which object removal technique is best suited for your specific video project and skill level.
| Factor | AI-Powered Tools | Manual Techniques (VFX) |
|---|---|---|
| Speed | Very fast; often requires just a few clicks. | Time-consuming; can take hours for a few seconds of footage. |
| Ease of Use | Beginner-friendly with intuitive interfaces. | Steep learning curve; requires technical knowledge. |
| Best For | Simple, static objects; clean backgrounds; quick turnarounds. | Complex scenes; moving objects; detailed backgrounds; high-end projects. |
| Control | Limited; you're relying on the algorithm's interpretation. | Complete creative control over every pixel and frame. |
| Cost | Can be very affordable or even free with some online tools. | Professional software and plugins can be expensive. |
| Result Quality | Good for simple jobs, but can produce artefacts or blurriness. | Flawless and undetectable when done correctly. |
Ultimately, both AI and manual methods have their place. Your job is to assess the footage, consider your deadline, and pick the tool that will deliver a clean, professional result without anyone ever noticing something was there in the first place.
By understanding the core concepts from the outset, you'll be equipped to choose the right approach for your project and achieve a polished, professional final product.
Whether you go with the speed of AI or the fine-tuned precision of manual editing, the goal is always the same: to make your edit completely invisible.
Preparing Your Footage for a Clean Removal
Honestly, most of the hard work in removing an object from a video happens before you even sit down to edit. That old industry joke, "we'll fix it in post," is a recipe for a world of pain. A few minutes of thoughtful planning on set can literally save you hours of tedious work later.
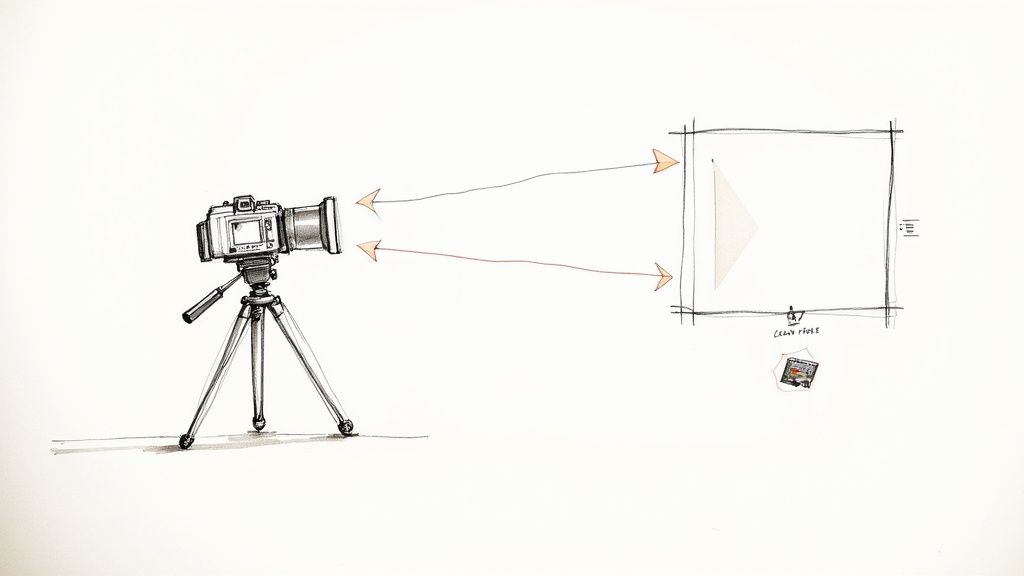
The absolute best thing you can do? Stabilise your shot. Seriously, if at all possible, use a tripod. A completely locked-off shot gives your editing tools a steady, consistent background to work with, which makes the whole process so much easier, whether you're using AI or doing it by hand.
Think about it: even a tiny bit of camera shake means the entire background is shifting from one frame to the next. This introduces a huge amount of complexity, making it a nightmare to isolate the unwanted object and replace what's behind it.
Capture a Clean Plate on Location
Here's a pro tip that will change the game for you: always shoot a "clean plate." This is your secret weapon. All it is is a few seconds of footage of the background without the object or person you plan to remove.
Once you’ve got your main take, just ask the actor to step out of the shot or move that distracting prop. Then, hit record again and capture that empty scene for at least 5-10 seconds.
This clean footage acts as a perfect reference library for your software. Instead of having to guess or algorithmically generate what the background looks like, it can simply borrow the real pixels—with the correct lighting, texture, and focus—directly from your clean plate. The result is an almost flawless patch.
I can't stress this enough: having a clean plate is the single most effective way to guarantee a professional, undetectable removal. It turns a complex reconstruction job into a much simpler layering task.
Choosing the Right Camera and Export Settings
The quality of your source footage makes a massive difference. You know those heavily compressed videos your phone or camera might record by default? They throw away a ton of visual information to keep file sizes small. This often leads to compression artefacts—that blocky, muddy look—which become painfully obvious once you start manipulating the footage.
To get around this, crank up your camera's quality settings as high as they'll go.
- Shoot with a higher bitrate. This captures more data every second, which is crucial for preserving the fine details and textures needed to create a seamless patch.
- Use professional codecs. If your camera supports them, recording in formats like ProRes or DNxHD is a huge step up from the standard H.264 or H.265 files. You'll have so much more information to work with.
- Export for editing, not for delivery. When you're pulling the footage into your editing software, don't export it as a final, compressed file. Use an intermediate codec to maintain maximum quality through the entire editing workflow.
Paying attention to these details ensures that any tool you use—including the powerful AI in the SoReel video enhancement platform—has the cleanest possible data to analyse. Better source material always leads to a more believable and professional final video. It’s as simple as that.
Using AI for Fast and Effective Object Removal
Forget spending hours editing a single frame by hand. Artificial intelligence has completely changed how we approach video editing, turning the once painstaking task to remove object from video into a job you can knock out in a few minutes. This isn't just for VFX pros anymore; it's a tool for everyone.
This change is part of a much bigger picture. The technology behind AI object removal is attracting massive investment here in the UK. The video analytics market alone is projected to rocket from USD 638.4 million in 2021 to over USD 5.38 billion by 2030. That growth shows just how essential these automated tools are becoming for creators. You can dig deeper into the growth of UK video analytics technology if you're curious about the numbers.
At their heart, these AI tools work in a refreshingly simple way. You just show the software what you want gone, and the algorithm takes care of the rest.
The AI Workflow in Action
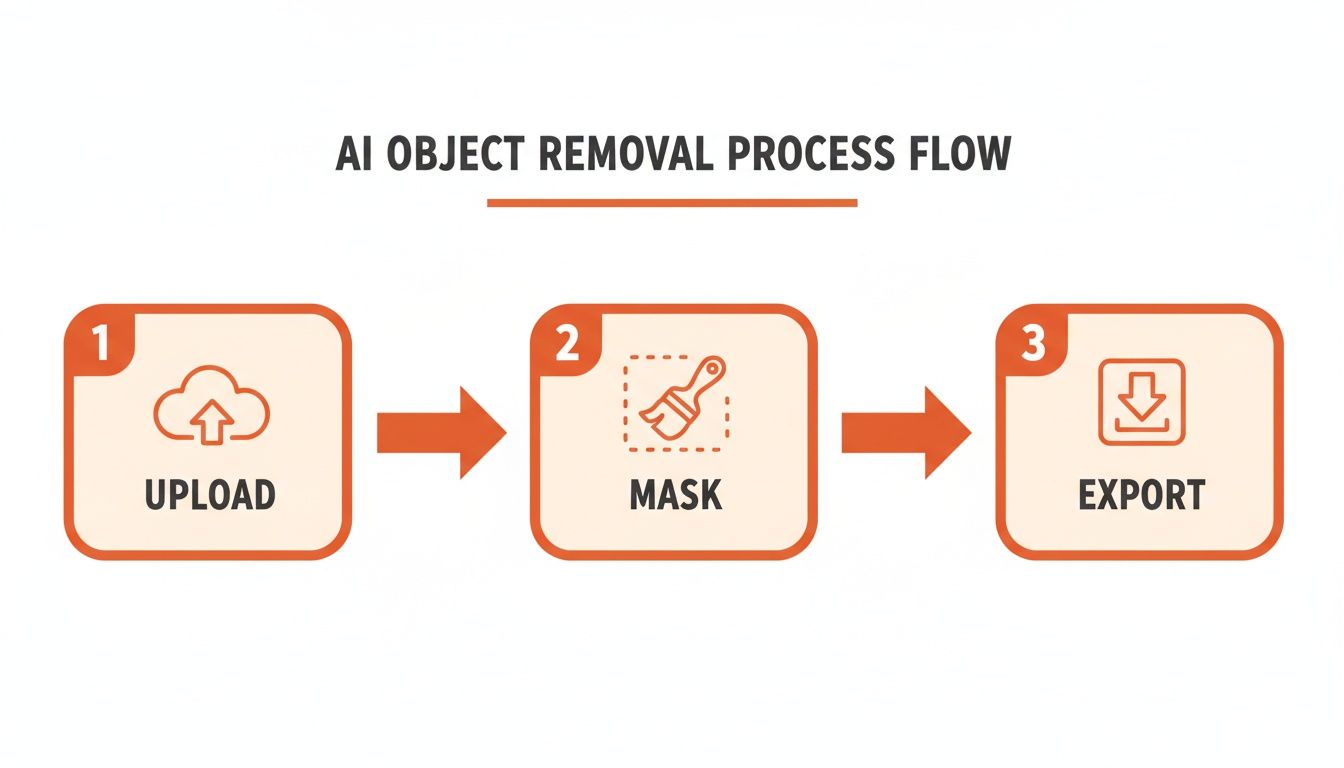
Typically, you'll start by uploading your video clip to an AI tool. From there, you just use a brush or a selection tool to paint over the unwanted object, whether it’s a stray coffee cup or a person in the background. This creates a mask that tells the AI precisely which pixels it needs to work on.
Here’s a look at what that masking process usually looks like.
The highlighted area is your instruction to the AI, making this first step quick and almost foolproof.
With the object masked, you hit the "go" button. This is where the clever part begins. The AI looks at the frames surrounding the masked object, analysing background textures, lighting, and movement. This technique, known as inpainting, lets the software intelligently rebuild what was behind the object, filling the space with pixels that look like they were always there.
Handling Movement and Multiple Clips
Where AI really shines is with moving objects. If you need to remove someone walking across the screen or a car driving past, you don't have to adjust the mask frame by tedious frame. Modern tools have that covered.
- Automated Tracking: The AI can follow the object you’ve masked as it moves, automatically adjusting the mask's position and shape from one frame to the next. It’s a huge time-saver.
- Background Prediction: Even if your camera is moving, the algorithm is smart enough to predict and generate the background based on the surrounding visual information.
For creators who are constantly pushing out new content, AI is a game-changer. The ability to process batches of clips or build object removal into an automated workflow means you can keep your quality high without slowing down.
This kind of efficiency is vital for anyone managing a busy social media calendar. If you're looking for more ways to improve your video creation process, you might be interested in the tips and guides on the SoReel blog.
The final result is a clean, professional-looking video, achieved with very little manual effort. It frees you up to spend less time fixing and more time creating.
Mastering Manual Removal for Professional Control
While AI tools are getting scarily good and incredibly fast, there are times when they just don't cut it. For those high-stakes projects—the ones where every single pixel counts—you need to roll up your sleeves and go manual. This is where professional software like Adobe After Effects gives you the granular control to remove an object from a video with absolute perfection.
Think of it less as an automated task and more as digital craftsmanship. You're making deliberate, creative choices frame by frame to ensure the final result is completely invisible. When the outcome has to be flawless, this is the path the pros take.
This kind of precision work isn't just for Hollywood, either. The UK's video surveillance market, valued at around USD 5.19 billion in 2024, often relies on these same sophisticated techniques to redact individuals for privacy. It’s a fascinating overlap of creative and security tech, which you can read more about in this UK video surveillance market report.
The Foundation: Masking and Rotoscoping
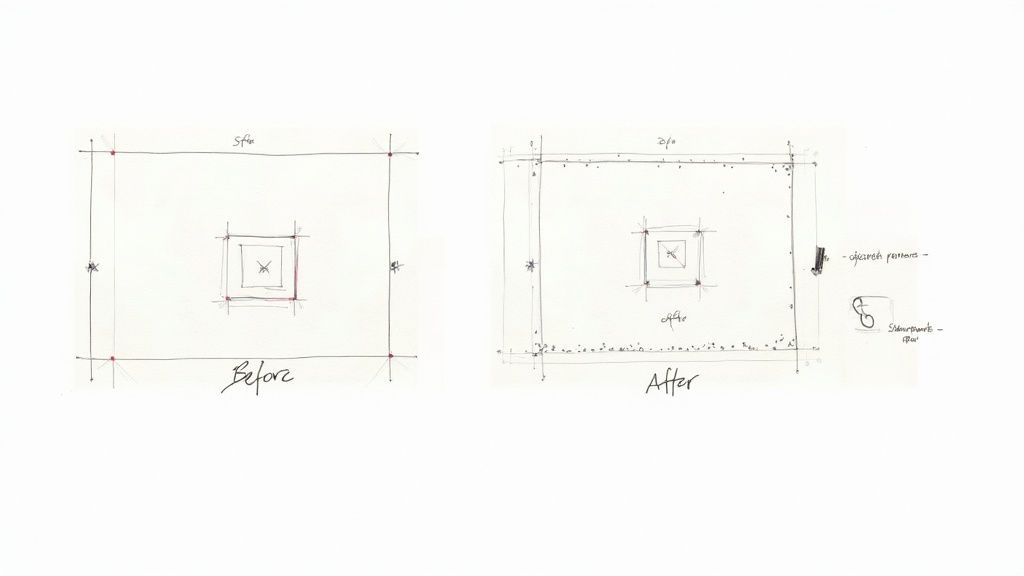
Your first job in any manual removal is to isolate the object you want to get rid of. This process is called rotoscoping, and it’s a true test of patience. You’re essentially drawing a mask around the object, but here's the catch: you have to adjust that mask’s shape and position on every single frame to perfectly match the object's movement.
It's meticulous, painstaking work, but it’s the absolute bedrock of professional VFX. The goal is to create a pixel-perfect outline that cleanly separates the object from everything else, giving you a clean plate to start rebuilding from.
This diagram shows a simplified workflow. While it's geared towards AI, the core concept of 'Masking' is exactly what we're doing here—it’s just that we’re the ones doing the intensive work, not the machine.
In a professional pipeline, that 'Mask' stage is our time-consuming, manual rotoscoping step.
Advanced Tools for Reconstruction
Once you've got your object perfectly masked out, the real artistry begins: rebuilding the background that was hidden behind it. This is where a couple of key tools become your best friends.
The Clone Stamp Tool: A classic for a reason. This tool lets you sample pixels from one part of the frame and paint them over the area you need to fix. The trick is to constantly change your source point. If you don't, you'll end up with repetitive, unnatural-looking patterns that scream "fake."
Content-Aware Fill: This is a much smarter function that looks at the frames before and after the object is visible to intelligently generate a patch. It can work wonders and save you a tonne of time, but you'll almost always need to do a bit of manual clean-up with the Clone Stamp to blend the edges seamlessly.
Here's a pro tip I've learned over the years: instead of using one big patch to cover an area, layer multiple smaller patches from different source points. This breaks up any uniformity and makes the final result look far more organic and believable.
The Importance of Motion Tracking
But what happens if the camera is moving? A static patch on a moving shot will stick out like a sore thumb. This is where motion tracking is non-negotiable.
Before you even think about masking, you need to track a high-contrast point in the background to analyse the camera's exact movement—be it a pan, a tilt, or a shaky handheld shot.
This tracking data gives you a digital anchor point. You can then "parent" your clean patch to this anchor, and it will move perfectly in sync with the rest of the scene. Skipping this step is a rookie mistake; your patch will look like it's sliding around, and the illusion will be instantly shattered. It's the critical link for integrating your manual edits into dynamic shots.
Refining and Finalising Your Edited Video
So you've successfully removed that distracting object from your shot. That's a huge step, but the work isn't quite done. The real art lies in the final polish, the subtle tweaks that make your edit completely invisible. This is where you transform a decent fix into a seamless, professional result.
A simple but surprisingly effective quality check is to just loop the edited section and watch it over and over. You’ll be amazed at what you spot on the fifth or sixth pass—a faint flicker, a bit of warping, or a slight colour shift in the patched area that you’d otherwise miss.
Matching Grain and Texture
One of the most common dead giveaways of a patched-up video is a texture mismatch. Almost all video has some level of natural film grain or digital noise. When you create a digital patch, it’s often perfectly clean and sterile, creating a smooth spot that just looks wrong against the rest of the frame.
The solution is to add that grain back in. Most pro-level editing software will have a "Match Grain" or "Add Grain" effect built-in.
- Take a sample: Use the tool to analyse a nearby, untouched part of the original footage.
- Apply it to your patch: Next, apply this sampled grain profile only to the layer with your fix.
- Tweak the settings: You’ll need to adjust the intensity, size, and sharpness of the grain until it blends perfectly with the surrounding video.
Honestly, this one step can make a massive difference. It's a technique we rely on all the time in post-production to make sure visual effects are truly undetectable.
Dealing with the Audio
It's easy to get so focused on the visuals that you completely forget about the sound. Think about it: did that car you just erased have an engine noise? Did the person you removed have footsteps on the pavement? If the sound is still there but the object is gone, it creates a weird, jarring feeling for the viewer.
You'll need to jump into your audio editor to sort this out. Sometimes this means using a spectral editor to surgically remove a specific frequency. Other times, it's as simple as dipping the volume for a moment and filling the gap with some clean, ambient room tone.
A successful object removal is a multi-sensory illusion. If the visual element is gone but its audio footprint remains, the brain notices something is wrong, even if it can't pinpoint exactly what.
Exporting for Social Platforms
Finally, think about where this video is going to live. Platforms like TikTok, Instagram, and YouTube have their own aggressive compression that can mess with all your hard work. A patch that looked perfect in your editor can suddenly reappear with ugly artefacts and blockiness once it's been uploaded.
To give your edit the best chance, export it using high-quality settings. A higher bitrate gives the platform's compression more data to chew on, which reduces the odds of it mangling your patch. I always recommend doing one last quality check after uploading to make sure your edit still holds up.
Common Questions About Video Object Removal
Once you start diving into object removal, you'll quickly realise that what seems simple on the surface can get complicated fast. Every shot presents its own unique challenges. Let's walk through some of the questions that pop up most often.
One of the biggest hurdles creators run into is movement. Taking a logo off a static shot with a locked-off camera is one thing. But what happens when the object, the camera, or both are moving? That’s where things get tricky.
Can I Remove a Moving Object From a Video With a Moving Camera?
Absolutely, but be warned: this is probably the toughest scenario you'll face. Some AI tools are getting surprisingly good at this, especially if they have robust tracking that can follow both the object and the background's motion at the same time. But for a truly seamless result, you'll often need to roll up your sleeves and go manual.
With a manual workflow, the first step is always motion tracking. You need to digitally "lock on" to a fixed point in the background to analyse the camera's movement. Once you have that tracking data, you can create your patch to cover the unwanted object and then "parent" it to the tracker.
This is the key. It forces your patch to move in perfect sync with the scene, so it doesn't just look like a blurry smudge floating in space. It takes a bit of practice in software like After Effects, but it's a non-negotiable skill for clean results in dynamic shots.
What Is the Hardest Type of Object to Remove?
The real nightmares are objects that are partially transparent, like a glass or a wisp of smoke, or anything highly reflective. Objects moving across complex, non-repeating background patterns are also incredibly difficult to deal with.
Think about it this way: removing a person walking in front of a simple brick wall is fairly easy. The pattern is predictable. But removing that same person as they walk past a crowd of other people or a forest with shifting leaves? That’s a whole different level of complexity.
The challenge isn't just about deleting the object. It's about convincingly recreating the unique, dynamic background that was hidden behind it, even for just a few frames. This is where both AI and manual techniques are really put to the test.
How Do I Fix the Smudge or Blur Left by AI Tools?
Ah, the classic AI smudge. It’s that blurry patch that screams "something was removed here." This happens when the algorithm makes its best guess at the background but doesn't quite get the texture right. It's a common issue, but thankfully, it's usually fixable. The solution is often a hybrid approach.
Start by letting the AI do the initial pass. It’s fast and gets you 90% of the way there. Export that version and bring it into a more powerful editor to do the fine-tuning.
- Add a texture layer: On a new layer, grab the Clone Stamp tool and set it to a low opacity.
- Source carefully: Gently paint some texture back over the blurry area. Make sure to sample pixels from a similar part of the background nearby.
- Match the grain: The secret sauce is often adding a subtle layer of matched film grain over the entire shot. This little trick does wonders for blending your patch and hiding any minor imperfections.
If you have more questions about the editing process, feel free to check out our complete SoReel FAQ section for more detailed answers.
Ready to clean up your footage without the headache? SoReel uses powerful AI to remove watermarks and objects seamlessly, delivering platform-ready videos in minutes. Try it now at https://soreel.app.