Remove Logos from Video: Quick Guide to remove logos from video with AI

Learn how to remove logos from video using AI and editors. Pro tips, quality tricks, and concise guidance to stay compliant.
So, you’ve got a fantastic bit of video, but there’s a stubborn logo or watermark plastered right where you don’t want it. It's a common headache. You can try to remove logos from video by cropping or blurring, but for a truly professional finish, advanced tools like AI inpainting are often the best bet. The right approach really hinges on what you need for your final project and how complex that logo is.
Why Bother Removing Logos from a Video?
Have you ever found a video clip that's almost perfect, only to be let down by a distracting logo? It’s a familiar frustration for creators and marketing teams. Getting rid of these logos isn't just a matter of tidying up the frame; it's a strategic move that can seriously elevate the quality and impact of your work.
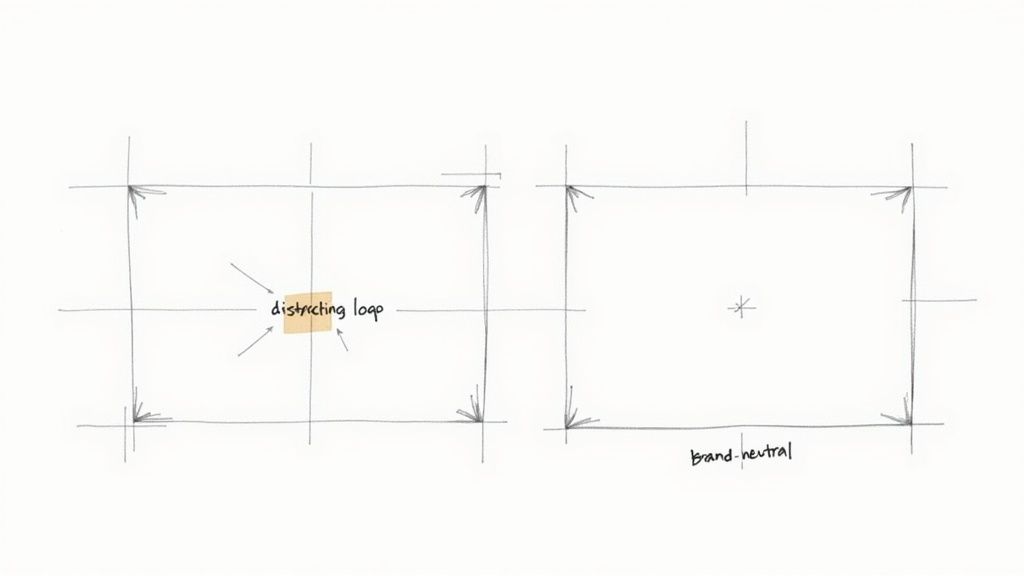
The main reason is to achieve a clean, brand-neutral look. Think about a marketing agency using a great piece of user-generated content (UGC) for a new campaign. If the original creator's branding or a TikTok watermark is left in, it muddies the agency's own message and can easily confuse the audience.
When Does Logo Removal Make Sense?
There are plenty of real-world situations where a clean video file is more than just a nice-to-have—it’s a necessity.
- Repurposing Content: You might want to reuse a video across different social media platforms. That YouTube outro with your channel logo feels jarring and out of place on a snappy Instagram Reel.
- Avoiding Brand Conflict: Picture this: you're using a stock video of a busy office for your new software ad, but a competitor's laptop logo is in plain sight. That’s a mixed message you can't afford to send.
- Improving Visual Flow: Logos, especially if they're animated, are designed to catch the eye. This can pull the viewer's focus away from your actual subject, disrupting the story you’re trying to tell.
- Creating a Polished Look: A video that’s free from third-party logos just looks cleaner and more professional. It shows you've put in the effort to create high-quality content that's truly your own.
This is a growing challenge for UK businesses and creators. As our appetite for online video grows, so does the need for adaptable, high-quality visuals. With many UK companies planning to produce more video content, efficient editing and automation tools are becoming mission-critical. You can read more about how the digital landscape is changing for UK creators over on the https://soreel.app/blog.
A clean video is like a blank page—it gives you complete creative control. Removing external logos allows your own message to stand out without competing for attention, ensuring your brand's voice is the only one the audience hears.
Ultimately, it’s all about making the content feel like it belongs to you. Whether you're blending in stock footage, chopping up a webinar, or polishing a client testimonial, a logo-free video gives you the creative freedom you need.
Navigating the Legal Side of Logo Removal
Before we get into the nuts and bolts of removing a logo from a video, we need to talk about the rules. It's easy to get excited about the technical possibilities, but altering footage you don't own isn't just a creative edit—it's a step into a complex legal minefield, particularly here in the UK. Just because you can erase a logo doesn't mean you should.
The first thing to get your head around is the difference between copyright and trademark. Copyright is what protects the creative work itself—the video, the music, the whole shebang. A logo, on the other hand, is usually a trademark. It's the symbol that protects a brand's identity and stops people from using it in a way that might cause confusion or damage their reputation.
When you scrub a logo, you could be treading on both of these. The act of changing the video itself can be a breach of the creator's copyright, and removing the trademark could be seen as misrepresentation. It's a tricky business.
Copyright and Trademark in the UK
Make no mistake, UK laws are robust on this front. Legal risk is a very real concern for businesses because UK trademark law gives brand owners serious power. They can prevent any unauthorised use that takes unfair advantage of their mark or harms its distinctive character. With regulators like Ofcom pushing for more online transparency, you can bet that edited content is getting more scrutiny than ever.
It all boils down to one simple concept: ownership. If you shot the footage yourself or have a clear, written green light from the owner, you’re usually safe. But grabbing a video off the internet and removing its branding for your next marketing campaign? That's a high-risk move.
Just look at the lengths the UK government goes to for trademark registration to understand how seriously this is taken.
This official process shows that a registered mark isn't just a pretty picture; it's a legally protected asset. That's precisely why removing one without permission is a big deal.
Platform Policies on YouTube and Instagram
Beyond the law of the land, the platforms where you post your content have their own rulebooks. YouTube and Instagram are notoriously strict when it comes to copyright and trademark infringement. Uploading altered content you don't have the rights to can have some pretty dire consequences.
- Content Strikes: YouTube doesn't mess around. Rack up three copyright strikes, and you risk your entire channel being permanently terminated.
- Account Suspension: Instagram is just as serious and will suspend or even delete accounts that repeatedly step over the intellectual property line.
- Reduced Reach: Even if your video stays up, the platform's algorithms might penalise it as manipulated media, tanking its visibility and reach.
These platforms have sophisticated systems designed to spot re-uploaded and modified content. Trying to fly under the radar is much harder than you might think. It's simply not worth risking your entire online presence for one video clip.
The golden rule is simple: if in doubt, get permission. It’s a costly mistake to assume you can use something just because you found it online. Always, always verify you have the right to use and modify content before you even think about opening an editor.
Staying Compliant and Avoiding Risks
So, how do you handle this safely? It all comes down to due diligence. Before you even consider removing a logo from a video, ask yourself a few honest questions.
Do I own this footage? Did I get a licence that specifically permits me to modify it? Could my use possibly fall under a legal exception, like 'fair dealing' for parody or review?
For most commercial work, you can forget about 'fair dealing'. The safest route is always to use royalty-free stock footage, create your own content from scratch, or get a written licence from the copyright holder that explicitly allows for changes like logo removal. And always read the fine print. The terms of service for any tool you use will outline your responsibilities. For more details on what’s expected of users, you can review the SoReel terms of service.
Doing this homework upfront keeps you on the right side of the law and, just as importantly, protects your own brand's reputation.
Choosing Your Logo Removal Method
Not all logos are created equal, and neither are the methods to remove them. Picking the right approach is a balancing act between the complexity of your video, the quality you need, and the time you have to spare. A quick-and-dirty crop might be fine for a casual social post, but getting a persistent watermark off a key marketing video demands a much more polished solution.
Understanding the main techniques is the first step towards a clean, professional result. Let's walk through four primary methods, from simple edits that take minutes to advanced AI processes that can work wonders on tricky footage. Each has its place, and knowing when to use which will save you a world of time and frustration.
Quick Fixes: Cropping and Blurring
The most straightforward way to remove logos from video is often the simplest. If the logo is tucked away in a corner, you might be able to crop it out entirely. This just means resizing the video frame to cut out the unwanted area, a basic feature in almost every video editor out there, from Clipchamp to Adobe Premiere Pro. It’s fast, effective, and requires no special skills.
The big drawback, of course, is that you lose part of your original video frame. If the logo is sitting close to an important subject, cropping will likely ruin the composition. It's a trade-off between speed and preserving your original shot.
Another simple trick is to apply a blur or pixelation effect over the logo. This doesn't technically remove it, but it does obscure it from view.
- Gaussian Blur: This creates a soft, out-of-focus effect over the selected area.
- Pixelation: This turns the logo into large, blocky pixels, making it unreadable.
- Mosaic Effect: Similar to pixelation, this breaks the area into coloured tiles.
These methods are best for situations where a perfect, invisible fix isn't critical, like hiding a brand in the background of a documentary-style video. The downside is that the blurred area itself can be distracting, clearly signalling to the viewer that you've deliberately hidden something.
Manual Precision: Masking and Cloning
For more control, manual techniques like masking and cloning offer a significant step up in quality. These methods, commonly found in software like Adobe After Effects, allow for precise, frame-by-frame adjustments.
Masking involves drawing a shape around the logo and then applying an effect only within that area. If the logo is static, you can set the mask once and you're done. If it moves, however, you’ll need to use motion tracking to make the mask follow it throughout the clip—a much more time-consuming process.
Cloning, or using a clone stamp tool, involves "painting" over the logo with pixels sampled from another part of the video. Imagine a logo on a clear blue sky. You can sample a clean patch of sky right next to it and use that to cover the logo. When done carefully, this can produce a nearly invisible result, but it demands patience and a good eye for detail.
The real challenge with manual cloning is consistency. Lighting, textures, and camera movement can make it incredibly difficult to maintain a seamless look across multiple frames. This is where the process becomes less of a technical task and more of an art form.
Advanced Automated Solutions: Content-Aware Fill
Taking manual methods a step further, Content-Aware Fill is a seriously powerful feature found in professional editing suites like Adobe After Effects. Instead of you manually cloning pixels frame by frame, the software analyses the areas surrounding the logo and intelligently generates new pixels to fill the space.
This technique is fantastic for static logos against a relatively complex but consistent background, like a textured wall or a grassy field. You just mask the logo, and the software does the heavy lifting of rebuilding the background. While it’s a world away from manual cloning, it can struggle with highly dynamic backgrounds or when the camera is moving rapidly, sometimes creating strange visual artefacts.
The Game Changer: AI Inpainting
The most modern and often most effective method is AI inpainting. Tools like SoReel use artificial intelligence to analyse the video content and reconstruct the area behind the logo with remarkable accuracy. Unlike Content-Aware Fill, which primarily looks at adjacent pixels, AI models are trained on vast datasets of images and videos. This gives them a much deeper "understanding" of what the background should look like.
This allows them to convincingly recreate complex patterns, textures, and even motion. It's the ideal solution for logos that are semi-transparent, moving, or placed over detailed and dynamic scenes. The rise of AI-driven video editing in the UK reflects a significant market need. With 95% of UK marketers seeing video as essential but 39% citing production time as a major hurdle, automated workflows like AI inpainting are becoming indispensable. You can discover more about how AI tools are shaping UK content creation.
AI inpainting automates what was once a painstaking manual process, allowing creators to remove logos from video quickly and without the steep learning curve of professional software. It's the go-to choice when quality and speed are both top priorities.
Comparison of Logo Removal Techniques
To help you decide at a glance, here’s a breakdown of how these four methods stack up against each other.
| Method | Best For | Quality Result | Time Required | Skill Level |
|---|---|---|---|---|
| Cropping/Blurring | Quick fixes where composition isn't critical. | Low to Medium | Very Low | Beginner |
| Manual Masking/Cloning | Static logos on simple backgrounds; full creative control. | High (if done well) | Very High | Intermediate to Advanced |
| Content-Aware Fill | Static logos on moderately complex backgrounds. | Medium to High | Medium | Intermediate |
| AI Inpainting | Dynamic/moving logos on complex, detailed backgrounds. | High to Very High | Low | Beginner |
Ultimately, there's no single "best" method—it all comes down to your specific needs. For a quick share, a blur will do. For a professional project with a tricky watermark, AI inpainting is likely your best bet.
Putting AI Logo Removal Into Practice
It’s one thing to talk about what AI can do, but seeing it work its magic is another thing entirely. Let's walk through a real-world scenario to show you just how simple it is to remove logos from video with a modern AI tool. You don't need to be a seasoned video editor to get fantastic results.
Picture this: you've found the perfect clip from an online interview for your social media feed. The content is spot on, but there’s a distracting news channel watermark permanently fixed in the bottom corner. It just doesn’t fit your brand's clean look. This is the perfect job for AI inpainting.
So, how do you know when to use AI versus a simpler fix? It really boils down to how complex the logo is.
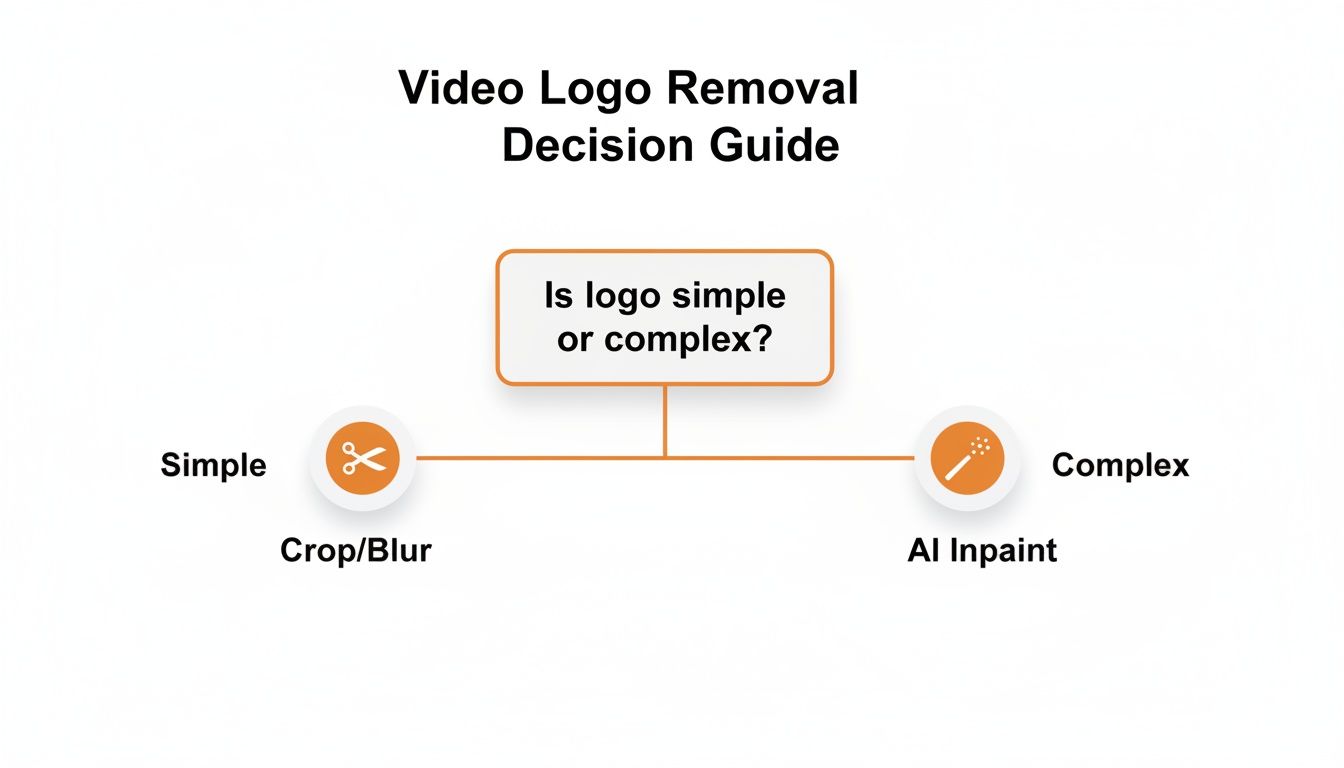
As you can see, a simple logo tucked away in a non-essential area might be solved with a quick crop or blur. But for anything more noticeable or intricate, you need the smarts of an AI to get a truly seamless finish.
The AI Workflow: From Watermark to Flawless
The best part about today’s AI tools is their simplicity. A task that once took hours of meticulous, frame-by-frame editing in professional software can now be done in a few clicks. The entire process is designed to be intuitive, getting you from a watermarked clip to a clean final version without the headache.
Most modern AI video editors, including SoReel, follow a similar, straightforward process:
- Upload Your Footage: Start by simply dragging your video file into the tool or pasting a link to it. No complicated project setups or timelines are needed.
- Select the Logo: Next, you tell the AI what to remove. This is usually done by drawing a simple box or mask right over the logo on the video preview.
- Let the AI Do the Work: With the logo marked, you just hit a button to start the process. The AI then analyses the surrounding frames and intelligently rebuilds the background pixels where the logo was.
- Review and Download: Once it’s finished, you get to preview the result. The logo should be gone, replaced by a perfectly reconstructed background. If you're happy, just download your clean, watermark-free video.
This approach completely flattens the learning curve that used to come with traditional video editing.
Handling Tricky Logos That Move or Change
Of course, not all logos sit still. Some drift across the screen, fade in and out, or have semi-transparent elements. These are the situations where AI really shines, but giving the tool a little help will ensure you get the best possible result.
A common headache is a logo that moves slightly because of camera shake. Instead of you having to track its position frame by frame, a good AI tool handles this automatically. The key is to make your initial selection mask just large enough to contain the logo throughout its entire range of motion.
Don’t draw your selection box too tightly. I’ve found that giving the AI a little breathing room around the logo works wonders. A slightly larger mask means that even if the logo shifts, it stays completely covered, helping the AI produce a much more consistent, artefact-free removal.
Another challenge is a logo with changing opacity—think of a watermark that fades in at the start of a video. Advanced AI models are trained for this. They can see the background showing through the logo and use that extra information to more accurately reconstruct the area once the logo is gone.
Fine-Tuning Your Settings for a Perfect Result
While the default settings on most AI tools are surprisingly good, sometimes a little tweak is needed for that flawless finish. This is especially true for videos with very busy or fast-moving backgrounds, where the AI has less stable visual information to work with.
For instance, if you notice a little bit of blurring or smudging where the logo used to be, you might need to adjust the AI model’s sensitivity. Some tools offer different models optimised for specific scenarios, like one for static shots and another for high-action footage. It's always worth experimenting with these options to clean up any minor imperfections.
You can see this process in action for yourself. For anyone ready to give it a go, you can download SoReel and test this AI workflow on your own video clips.
Ultimately, using AI to remove logos from video turns a once-daunting task into a quick and easy step in your content creation process. It lets you clean up footage on the fly, maintain your brand's aesthetic, and produce high-quality videos without needing a degree in visual effects. The end result is a polished video where your message is the only thing your audience is focused on.
How to Maintain Video Quality After Editing
You’ve done the hard part and successfully scrubbed that pesky logo from your video. It’s a great feeling, but that victory can quickly turn sour if your final export ends up looking like a blurry, pixelated mess. The truth is, the editing process itself—especially re-saving and exporting—is fraught with opportunities to lose quality.
Every single decision, from the file you start with to the final render settings, plays a massive role in preserving the sharpness and clarity of your footage.
Think of your video data like a photocopy. The first copy looks fantastic, almost identical to the original. But if you start making copies of that copy, each new version gets a little fuzzier. It’s the same principle when you repeatedly compress a video file. To sidestep this degradation, your first rule should be simple: always start with the highest-quality source file you can get your hands on. A crisp 4K source has so much more data to work with than a compressed 720p clip you’ve pulled from social media, giving you far more breathing room during editing.
Understanding Codecs and Compression
Whenever you save a video, it’s being squeezed down by a codec (a mash-up of coder-decoder). This is the software that shrinks a massive, raw video file into something manageable for streaming or sharing. But here’s the thing: not all compression is created equal.
Some codecs use lossless compression, which is brilliant because it keeps all the original data, but the file sizes are enormous. Far more common are lossy codecs, like the familiar H.264 (AVC) or its more efficient cousin H.265 (HEVC). These work by cleverly throwing away data the human eye is less likely to notice. It’s a fantastic trick for reducing file size, but it's exactly where quality can be sabotaged if you’re not careful.
The key takeaway is this: every time you export a video using a lossy codec, you are permanently throwing away some of its original data. To maintain the best possible quality, you want to minimise the number of times you re-compress the footage.
This means you should aim to do all your edits—including removing that logo—in a single session before you export the final version.
Nailing Your Export Settings
Your export settings are the final quality-control checkpoint. Getting them right is what ensures your video looks just as good on YouTube or Instagram as it does on your editing timeline. The big three you need to master are bitrate, resolution, and frame rate.
- Resolution: This is simply the size of your video frame (e.g., 1920x1080 for "1080p"). You should almost always export at the same resolution as your source footage unless you have a specific reason to downsize it.
- Frame Rate: This is how many individual images flash on the screen per second (e.g., 24, 30, or 60 fps). Keeping this consistent with your original footage is crucial for smooth, natural motion.
- Bitrate: This one is arguably the most critical setting for quality. Bitrate determines how much data is used to encode each second of video. Higher bitrate = more data, better quality, and a larger file.
This screenshot from Adobe Premiere Pro's export panel shows where you can control these vital settings.
The panel highlights options for format (like H.264), presets for specific platforms like YouTube, and sliders to manually adjust bitrate, which directly impacts the final output's clarity and file size.
Best Practices for Quality Preservation
Let's pull this all together with some practical advice you can apply to every single project. Think of this as your pre-flight checklist before you even think about hitting that "Export" button.
- Work from a Master File: If you can, always start with the original, uncompressed footage. This is your "digital negative."
- Choose the Right Codec: For final delivery, H.264 is still a fantastic, universal standard. If you’re working with 4K content, H.265 (HEVC) will often give you better quality for a similar file size.
- Use Platform Presets: Most editing software comes with built-in export presets optimised for platforms like YouTube or Vimeo. These are a brilliant starting point because they use recommended bitrates and settings.
- Avoid Multiple Exports: Try to get all your edits done in one go. Exporting a clip, re-importing it for another tweak, and then exporting again is a surefire recipe for quality degradation.
Ultimately, maintaining video quality after you remove logos from video is all about being deliberate. By understanding the fundamentals of compression and paying close attention to your export settings, you can ensure all your hard work results in a final product that isn't just clean and logo-free, but also crisp, professional, and ready for any screen.
Got Questions About Removing Video Logos? We've Got Answers
When you first start looking into how to remove logos from a video, a lot of questions pop up. It's not just about the technical side of things; there are legal grey areas and quality concerns that can feel a bit overwhelming. To cut through the noise, I've put together answers to the most common queries I hear from creators and marketers.
Think of this as your quick-start guide to handling the main hurdles. Getting these basics right from the beginning will save you a ton of headaches and help you end up with a much cleaner, more professional final cut.
Is It Actually Legal to Remove a Logo from a Video?
This is easily the most important question, and the answer is a hard no—not unless you own the video or have explicit permission. Removing a logo from content you don't own the rights to is a direct infringement of copyright and trademark law here in the UK.
There are some very specific exceptions under 'fair dealing' rules, like for academic criticism, reviews, or parody. But for any kind of commercial use, these almost never apply.
The only safe assumption is that you don't have the right to alter someone else's video. If you're working on a marketing campaign or any commercial project, getting proper permissions isn't just a good idea; it's essential to avoid legal trouble and having your content pulled down from platforms like YouTube.
What's the Best Software for the Job?
The "best" tool really boils down to your specific needs, your budget, and how comfortable you are with video editing. There's no single perfect solution, but they generally fall into three camps.
- For the Pros: Adobe After Effects is the industry workhorse. With tools like Content-Aware Fill and powerful motion tracking plugins like Mocha Pro, it gives you ultimate control. The catch? It comes with a seriously steep learning curve.
- For Speed and Simplicity: Modern AI-powered tools like SoReel are built for one job: getting rid of unwanted elements cleanly and quickly. They automate the fiddly parts, which is ideal if you need great results without sinking hours into manual edits.
- For Quick Fixes: If all you need is a simple blur or a crop on some non-critical footage, basic editors like CapCut or even the built-in masking tools in Premiere Pro can handle it in a pinch.
It’s all about balancing the complexity of the logo you’re dealing with against the time and expertise you have available.
How Do You Remove a Logo That Moves Around?
Tackling a logo that moves across the screen is a whole different ball game. This requires a process called motion tracking, which is where professional software like After Effects or DaVinci Resolve really shines. The basic idea is to create a mask that follows the logo's exact path, frame by agonising frame.
Once that moving mask is locked onto the logo, you can apply your removal technique—be it a blur, a clone stamp, or an AI fill. The good news is that the latest AI tools are getting surprisingly good at automating this, turning what used to be a tedious, highly manual job into a much simpler task.
Will Removing the Logo Ruin My Video Quality?
It definitely can if you're not careful. Every time you re-export a video, you're re-compressing it, which can introduce nasty artefacts like blurriness or blockiness. To keep your video looking crisp, stick to a few golden rules.
- Start with the Best Source File: Always work from the highest-resolution version of the video you can get your hands on. The more data you start with, the better the final output will look.
- Avoid Re-Exporting: Try to do all your edits in one go. Exporting, re-importing for another tweak, and exporting again is the fastest way to degrade quality.
- Use High-Quality Export Settings: When you do export, pay close attention to the bitrate. A higher bitrate tells the software to preserve more detail, giving you a much cleaner final result.
Some AI tools can introduce subtle visual artefacts, so it’s always a good idea to give your final video a thorough watch-through before you publish it.
Ready to create perfectly clean, professional videos without the hassle? SoReel uses advanced AI to remove logos and watermarks with incredible precision, all while enhancing your video's overall quality. Try it today and see how easy it is to make your content truly your own. Learn more about SoReel.