How to Remove Audio Noise for Clear Sound

Learn how to remove audio noise from your videos and podcasts. This guide covers AI tools, manual techniques, and pro tips for crystal-clear audio.
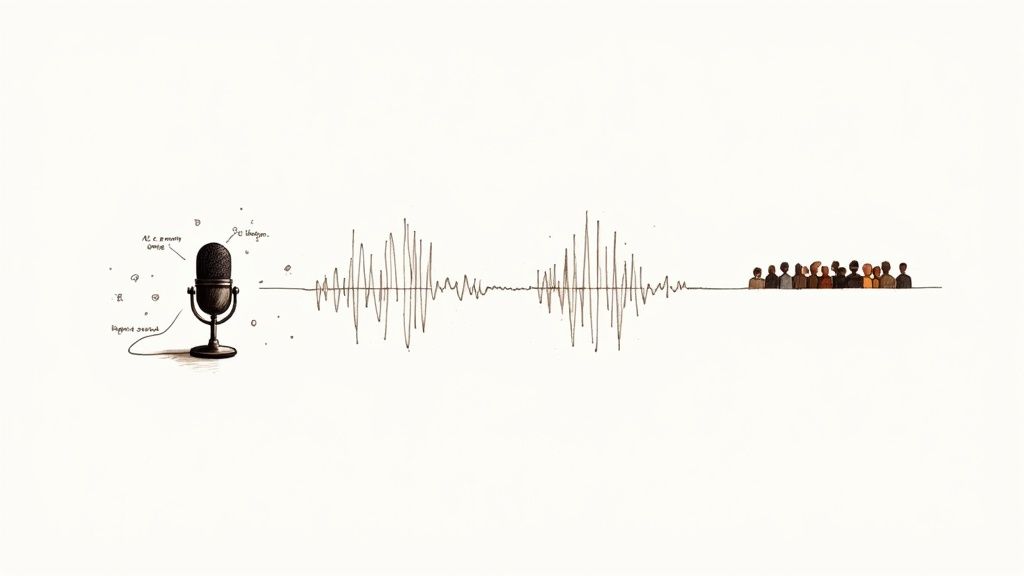
You’ve poured your heart into creating brilliant content, only to find the recording is ruined by a distracting background hum. Learning how to remove audio noise is one of those fundamental skills that really separates the pros from the amateurs. The right techniques can salvage what you thought was a lost cause, making sure your audience actually hears your message.
Why Clean Audio Is a Non-Negotiable
Let's be blunt: bad audio kills great content. Before we get into the nitty-gritty of audio repair, it’s worth taking a moment to appreciate why clean, crisp sound is so vital for videos, podcasts, or any kind of digital media. That persistent buzz from the air con or the muffled chatter from the next room might seem like a small thing, but these little distractions slowly erode your credibility and your audience's patience.
The Real Price of Poor Sound
Think about what actually happens when the sound is off. A podcaster whose episodes are always plagued by fan noise is probably going to struggle to grow their subscriber base. People are incredibly quick to click away from a YouTube tutorial if they can't make out what the speaker is saying over traffic noise. I’ve seen online course creators get terrible reviews not because their material was bad, but because a nasty echo made the lessons a headache to get through.
These aren't just technical glitches—they're brand problems. Clean audio tells your audience you're a professional who respects their time. When you make the effort to remove audio noise, you're showing your listeners you care about their experience.
It's Okay to Be Frustrated
It is unbelievably frustrating to put so much effort into producing great content, only to have people tune out because of something as fixable as bad audio. You did all the hard work—the research, the scripting, the filming—but a simple sound issue can bring the whole thing crashing down. Trust me, it’s a pain every creator has felt at some point.
The goal isn't just to fix a technical issue. It's about making sure your message lands exactly as you intended, without any auditory roadblocks getting in the way.
The good news? You have far more control over this than you might think. With modern tools and a few good habits, you can transform muddy, distracting audio into something that sounds polished and professional. Understanding why this matters is the first step to mastering how to do it.
A clean soundtrack directly leads to:
- Better Viewer Retention: People will stick around much longer if the audio is clear and easy to listen to. It’s that simple.
- Stronger Credibility: Professional-sounding audio instantly builds trust and makes you sound like an authority.
- Clearer Message: Without background noise fighting for attention, your actual message comes through loud and clear.
In the end, focusing on clean audio isn't just about playing with filters and EQs. It’s a core part of creating content that actually connects with people and achieves what you set out to do. By learning to effectively remove audio noise, you’re taking a huge step towards levelling up the quality of your entire production.
Let's be honest, the best way to remove audio noise is to stop it from creeping into your recording in the first place. While modern software is incredibly powerful, it’s not magic. Trying to fix a noisy recording in post-production is often a frustrating, time-consuming battle. Starting with clean audio will always give you a better result and save you a world of pain later.
This is more straightforward than it sounds. You don’t need to build a professional, soundproofed studio. Most of the time, it just comes down to making a few smart adjustments to your space and your gear before you hit that record button.
Tame Your Recording Space
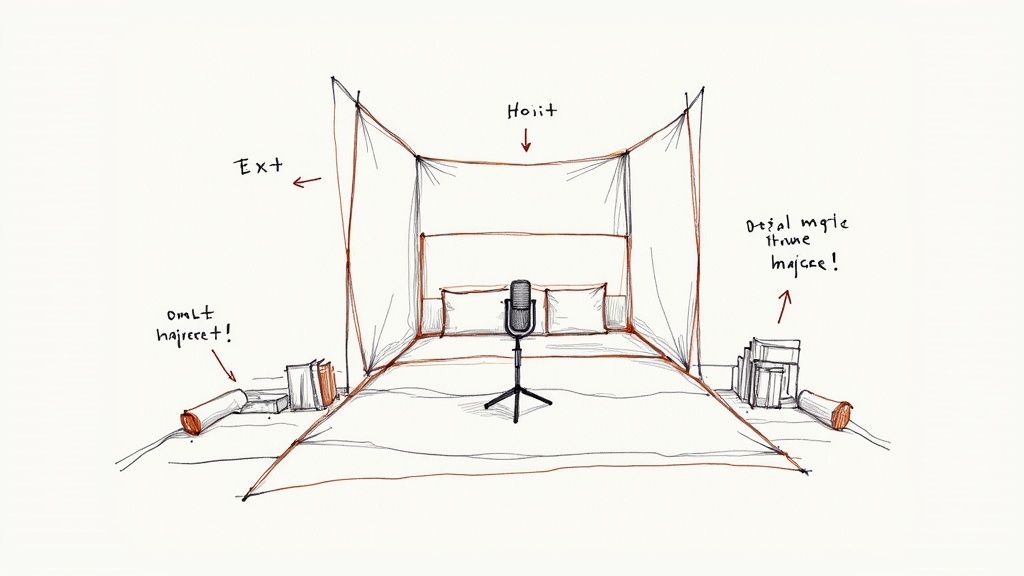
Most of us aren’t recording in purpose-built studios. We're in home offices, spare bedrooms, or living rooms – spaces full of hard, flat surfaces. Desks, walls, windows, and wooden floors are basically mirrors for sound waves. Your voice hits them, bounces around, and creates the kind of echo and reverb that makes your audio sound muddy and unprofessional.
Your job is to soak up those reflections. The good news? You can probably do it with stuff you already have lying around.
- Soften Your Surfaces: Got a spare duvet or a thick blanket? Throw it on the floor. If you've got a big, reflective desk, cover that too.
- Use Your Furniture: A bookshelf packed with books is a fantastic sound diffuser. Recording in front of one can work wonders. Soft furnishings like sofas and armchairs are also great at absorbing sound.
- Cover Windows and Walls: Simply closing the curtains can dampen reflections from the glass. For a quick fix, you can even hang a heavy blanket on the wall behind you to act as a makeshift acoustic panel.
Remember, the goal isn't total silence. You're just trying to minimise those distracting echoes to get a more controlled, focused sound. Even these small tweaks can make a massive difference.
The value of simple sound absorption is no secret. Even the UK's industrial noise control market, valued at USD 0.32 billion in 2025, relies heavily on flexible solutions. Things like acoustic blankets and foam account for nearly 49% of the market, which just goes to show how effective these basic materials are. You can discover more about this market's growth over on Fortune Business Insights.
Before you can tackle the noise, you need to know what you're listening for. This quick guide will help you diagnose the problem so you can find the right solution.
Identifying Common Audio Noise and Its Source
| Noise Type | What It Sounds Like | Most Common Source |
|---|---|---|
| Hiss | A high-frequency, static "ssss" sound | Low-quality preamps, high gain settings, old cables |
| Hum | A low-frequency, constant drone (50/60 Hz) | Electrical interference, poorly grounded equipment |
| Reverb/Echo | Your voice sounds distant, like you're in a large hall | Hard, reflective surfaces in your recording space |
| Plosives | A sudden "pop" or burst of air on "p" and "b" sounds | Speaking too close or directly into the microphone |
| Clicks & Pops | Sharp, random crackling noises | Digital recording errors, mouth noises, vinyl dust |
| Background Noise | Distant traffic, computer fans, air conditioning | Your recording environment, microphone picking up everything |
Once you can put a name to the noise, you're halfway to fixing it, often before you even press record.
Choose the Right Microphone Pattern
Your microphone has ears, but it doesn't just "hear everything". It's designed to listen in specific directions, and understanding its pickup pattern is a game-changer for getting clean audio. For most creators, this comes down to two main types: Cardioid and Omnidirectional.
Cardioid microphones are your best friend for solo work. They pick up sound from the front and reject sound from the sides and rear. This makes them perfect for vlogging, voiceovers, or podcasts, as they focus on your voice and ignore a lot of the room's ambient noise.
Omnidirectional microphones hear everything equally from all directions (a full 360-degree bubble). This pattern is what you want for a group interview or a roundtable discussion with a single mic, ensuring everyone is captured clearly without some voices sounding faint and distant.
Master Your Microphone Placement
Where you put your mic is just as crucial as which one you choose. So many audio issues, from thin-sounding vocals to excessive background noise, come down to poor placement.
The secret is getting close. As a rule of thumb, position the microphone about 15-30 centimetres (6-12 inches) from your mouth. This simple trick ensures your voice is the loudest thing the mic hears, pushing any background hum from your computer fan or air conditioning way into the background.
Here's another pro tip: try speaking slightly across the front of the microphone, not directly into it. This helps you avoid plosives – those harsh "p" and "b" sounds that send a blast of air into the mic's diaphragm. It's a simple technique that creates a smoother, more professional sound. A pop filter is still a good idea, but good technique is free.
By getting these fundamentals right, you're setting yourself up for success. You're giving yourself the best possible starting point, which makes the final job to remove audio noise a whole lot easier.
Let AI Do the Heavy Lifting for You
Let's be realistic: preventing noise at the source is the gold standard, but it's not always achievable. For busy creators who need professional results without spending hours lost in complex audio software, AI-powered tools are an absolute lifesaver. This modern approach often boils down to a single click to remove audio noise, turning a tedious technical chore into a quick, simple step in your workflow.
Instead of manually hunting for hums or painstakingly carving out specific frequencies with an EQ, these intelligent tools analyse your entire audio track. They've been trained on massive libraries of both clean speech and all sorts of noise, which means they can instinctively tell the difference between your voice and the annoying buzz of the air conditioning.
This is a huge leap forward. Think about it like this: cleaning audio manually is like trying to erase tiny stray pencil marks on a detailed drawing, hoping you don't smudge the important lines. An AI tool, on the other hand, instantly knows which marks are part of the art and which are mistakes, cleaning them up perfectly without touching the original image.
How AI Makes It All So Simple
So, what does a typical workflow with a modern AI tool actually look like? The real beauty is its simplicity, which is completely by design. It's meant to save you time and mental energy that's far better spent on the creative side of things. You no longer need a degree in audio engineering to get broadcast-quality sound.
The whole process usually just involves a few straightforward actions:
- Upload Your File: Just drag and drop your video or audio file. You don’t even need to separate the audio from the video first; the tool handles that for you.
- Let the AI Work: You'll typically find a single toggle or button, often labelled something like "Enhance Audio." One click, and the AI gets to work.
- Download the Clean Version: After a few moments, your polished file is ready to download, with all that distracting background noise either gone or drastically reduced.
The demand for these powerful, easy-to-use solutions is exploding. The global audio noise suppressor market was valued at an impressive USD 1,304 million back in 2025, and it’s only projected to grow. The UK is a standout consumer in Europe, with huge demand in both professional broadcasting and for everyday consumer tech. You can dig into more data on the growth of audio noise suppressor technologies on marketreportanalytics.com.
It’s More Than Just Noise Reduction
What makes these tools so incredibly effective is that they often do much more than just remove audio noise. They perform a whole suite of enhancements in one go, intelligently optimising your sound for modern platforms.
The real power of AI audio tools isn't just in what they remove, but in what they preserve and enhance. They intelligently clean the background while making sure your voice remains clear, natural, and present.
Think of it as having an automated audio engineer on your team. A good AI tool will often handle:
- Intelligent Noise Removal: It precisely targets and eliminates persistent background sounds—air con hums, computer fan whirs, distant chatter—without making your voice sound thin or robotic.
- Volume Normalisation: It automatically adjusts the volume of your audio to a consistent, professional level. This gets rid of those jarring moments where your voice is too quiet or suddenly too loud, which is vital for keeping your audience engaged.
- Platform-Specific Mastering: Some advanced tools can even master your audio for specific platforms. An audio track optimised for YouTube's algorithm will have different characteristics than one for a Spotify podcast, and AI can handle these nuances for you.
For creators juggling multiple projects, this is a massive win. The time you save on technical audio editing can be reinvested into creating more content or engaging with your community. For a deeper dive into content strategies that can benefit from this kind of workflow, check out the various resources on the SoReel blog.
The AI Advantage Over Going Manual
To really appreciate the difference, let’s compare the workflows. Manually cleaning a ten-minute audio file could easily take an experienced editor 30-60 minutes using traditional tools. They'd have to isolate a noise print, carefully tweak thresholds, and listen back over and over again to make sure they haven't introduced weird digital artefacts.
With an AI tool like SoReel, that same ten-minute file is cleaned, normalised, and ready for export in just a couple of minutes, with almost no input from you. This isn't just about speed; it's about accessibility. It gives creators without a technical background the power to achieve audio quality that was once reserved for those with specialised skills and expensive software. This is levelling the playing field for everyone.
Taking Control with Manual Noise Removal
While AI tools are fantastic for speed and simplicity, some audio problems are just too stubborn for a one-click fix. When you need surgical precision to tackle a specific issue without messing up the rest of your track, it’s time to roll up your sleeves. This is where you move beyond the basics and really master how to remove audio noise.
Don't let the technical names like "Noise Gate" or "Spectral Repair" put you off. Think of them as specialised brushes in your creative toolkit. Learning to use them gives you complete control over your final sound, letting you fix those tricky issues with the confidence of a pro.
Using a Noise Gate to Silence the Gaps
One of the most common headaches is that low-level hiss or room tone you hear in the quiet moments between sentences. For this, a Noise Gate is your best friend. It’s essentially an intelligent, automatic mute button.
A noise gate works by setting a volume floor. Any sound that falls below that level gets silenced, while anything above it passes through untouched. It's an incredibly clean way to deal with the dead air in your recordings.
Picture this: you've recorded a great voiceover, but your mic has a faint electronic hiss. You can't hear it when you're talking, but it pops up in every single pause, making the whole thing sound a bit amateur.
To fix it, you’d simply:
- Set the Threshold: Adjust this so it’s just a touch higher than the hiss, but well below your voice.
- Tweak Attack and Release: These settings control how fast the gate opens and closes. A quick attack ensures you don't clip the start of your words, while a gentle release stops the sound from cutting off unnaturally.
The result? That distracting hiss just vanishes from the pauses, leaving you with clean, crisp silence between your phrases.
Surgical Cleaning with a Parametric Equaliser
Sometimes the problem isn't a general hiss, but a very specific, annoying frequency—the low hum from a fridge, the whine of a fan, or a buzz from a light fitting. This is where a Parametric Equaliser (EQ) comes in.
Unlike a simple bass and treble control, a parametric EQ lets you find an exact frequency and cut its volume without affecting anything around it. It’s a surgical technique that allows you to remove audio noise while keeping the natural warmth and character of a person's voice.
Imagine you're editing a podcast and there’s a constant, low drone around 60 Hz from the building’s wiring. Your guest’s voice, meanwhile, mostly lives between 100 Hz and 3000 Hz.
Using an EQ, you can perform a very precise operation:
- First, you find the exact frequency. A common trick is to boost a narrow band and sweep it across the frequencies until that hum becomes really obvious.
- Once you've nailed it, you do the opposite: you pull the volume (gain) for that specific frequency way down.
- The hum disappears, but because you only touched that one tiny slice of the audio spectrum, your guest’s voice still sounds full and clear.
A key thing to remember with manual noise removal is that less is often more. The goal isn't sterile, absolute silence—that sounds weird. It's about reducing the noise until the listener simply doesn't notice it anymore.
This infographic shows a typical AI workflow, which is a great contrast to the detailed, hands-on control we're talking about here.
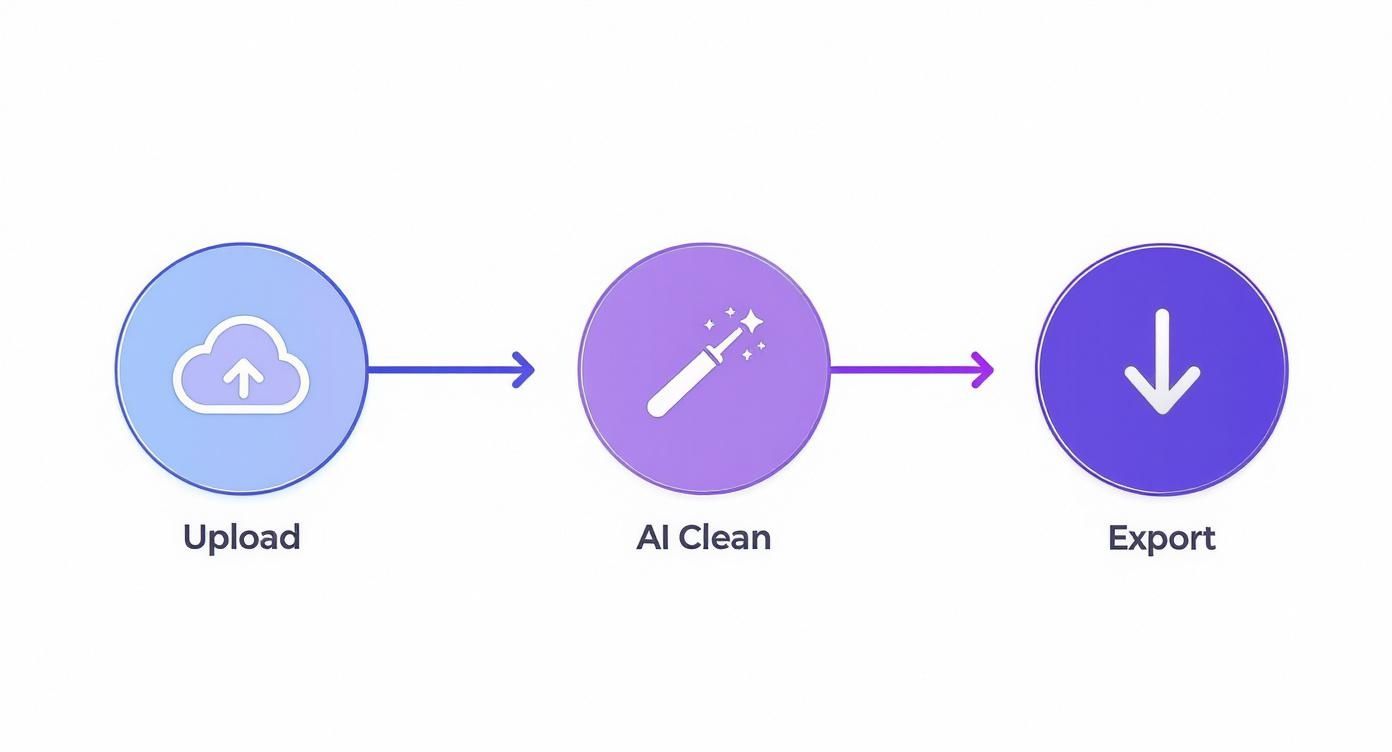
While the AI process is a simple three-step affair (upload, clean, export), these manual tools give you granular control over every single detail of that "clean" phase.
Visually Erasing Sounds with Spectral Repair
But what about noises that aren't constant? A sudden dog bark, a door slamming, or a loud keyboard click can ruin a perfect take. Gates and EQs are useless against these, which is where Spectral Repair tools come into play. This is easily one of the most powerful—and surprisingly visual—ways to remove audio noise.
Tools like Adobe Audition or iZotope RX let you see your audio as a spectrogram. Instead of a simple waveform, you get a visual map of frequency over time, where louder sounds show up as brighter spots.
In this view, an unwanted noise like a phone ping appears as a distinct, bright blob. It's the sound's visual fingerprint. Fixing it feels a lot like using the spot-healing brush in Photoshop:
- You look at the spectrogram and spot the visual blip of the unwanted noise.
- You use a selection tool to draw a box right around it.
- You hit "repair" or "delete," and the software cleverly rebuilds that tiny section based on the surrounding audio.
The results are often mind-blowing. The distracting sound is just gone, as if it never happened, leaving the original recording perfectly intact. This is the kind of tool that can rescue a take you thought was completely unusable, making it an essential skill for anyone serious about high-quality audio.
Building Scalable Workflows for Teams
https://www.youtube.com/embed/x7xrCX1m_k4
When you’re a solo creator, fixing audio on a file-by-file basis is manageable. But once you start running a content team, that ad-hoc approach quickly becomes a bottleneck. For creative agencies and production houses, consistency and efficiency are everything. The challenge shifts from simply knowing how to remove audio noise to building a system that does it reliably across hundreds of projects a week.
It’s time to move beyond reactive fixes. You need a proactive, scalable workflow that guarantees every piece of content meets your brand's audio standards without slowing down production.
Automating Consistency with Batch Processing
Let’s say your team just wrapped up filming ten client testimonials. Each one was shot in a different office, so they all have their own unique background hum and room tone. Cleaning them up one by one would be a mind-numbing task, and the results would inevitably be inconsistent. This is exactly where batch processing shines.
Instead of tweaking individual files, you can apply a pre-configured set of audio enhancements to a whole group of files at once. You can design a custom preset that nails the perfect balance of noise reduction, EQ, and volume normalisation for your typical recording environment.
- Define Your Standard: Start by creating a "brand sound" template with your ideal noise reduction settings and target volume levels.
- Apply in Bulk: Next, just select all your raw audio or video files and apply that template in a single click.
- Ensure Consistency: Every file gets the exact same treatment, giving you a uniform sound across an entire campaign.
This simple shift saves a staggering amount of time and removes the guesswork. It ensures that the tenth testimonial sounds just as crisp and professional as the first.
Integrating Audio Cleanup with API Workflows
For teams producing content at an even greater scale, the next step is to integrate audio processing directly into your production pipeline using an Application Programming Interface (API). An API lets your different software tools communicate with each other, creating a seamless, automated workflow that runs in the background.
An API-driven workflow transforms audio cleanup from a manual chore into an automated checkpoint. It builds a system where clean audio is the default, not an afterthought.
Picture a marketing agency that pumps out hundreds of short-form social media videos every month. With an API, their process becomes incredibly efficient. An editor finishes a cut and uploads it to a shared folder. This action automatically triggers the SoReel API to remove audio noise, normalise the volume, and generate a final, platform-ready video.
The cleaned-up file can then be pushed to the next stage—be it a content management system or a client review platform—without a single person having to manually intervene. This doesn’t just speed up delivery; it frees up your creative team to focus on what they do best. To see how this can fit into your operations, you can explore the different options in our SoReel pricing plans.
This kind of system-level integration is becoming more important as audiences expect higher audio quality. In fact, the UK's noise control system market is projected to grow at a CAGR of 4.4% through 2035, driven by commercial spaces like studios and offices investing in better acoustics. This reflects a broader industry trend towards prioritising pristine sound—a standard that any team can achieve with the right automated workflow. You can read the full analysis on this market trend to get a deeper sense of why professional audio is no longer optional.
Your Questions on Audio Noise Removal Answered
Even with the best techniques in your toolkit, a few common questions always pop up when you start getting serious about cleaning up your audio. Getting your head around these fundamentals can clear up a lot of confusion and help you make better decisions, whether you're using a quick AI fix or diving deep into a manual edit.
Let's tackle some of the most frequent queries I hear.
One of the biggest is whether you can truly eliminate every last speck of noise. While today's tools are incredibly powerful, chasing that elusive 100% removal can often do more harm than good. Go too far, and you’ll strip the life right out of the voice, leaving it sounding thin, robotic, or riddled with strange digital artefacts.
The real goal isn't sterile silence; it's to push unwanted noise down to a level where it’s simply unnoticeable to the listener. Your best bet is always to start with the cleanest recording possible and use post-production for polishing, not for a complete audio rescue mission.
AI Tools Versus Manual Techniques
Another common sticking point is deciding which path to take. Should you rely on AI for speed, or put in the hours to learn manual methods? For most content creators, let's be honest, AI tools offer the best balance of speed and quality. They can handle about 95% of common audio problems efficiently, making them a lifesaver when you're up against a deadline.
Learning manual techniques is a brilliant next step for anyone who needs to fix tricky, irregular sounds—like a sudden clang or a dog barking mid-sentence—or for audio pros who want complete creative control over their final mix.
In reality, a powerful workflow often involves a bit of both:
- Start with AI: Let an AI tool do the initial heavy lifting. It can quickly clear out persistent background hum and get your volume levels consistent.
- Finish with Manual Tweaks: Jump in with manual tools like a surgical EQ or spectral repair for that final, precise polish. This is where you can catch any tricky sounds the AI might have missed.
Understanding Noise Gates and Noise Reduction
It's also crucial to know the difference between a noise gate and a noise reduction tool, because they solve very different problems. A noise reduction algorithm actively analyses and removes constant background sounds (like hiss or fan hum) from the entire track, even while you're speaking.
A noise gate, on the other hand, is much simpler. Think of it as an automatic mute button. It completely silences the audio during pauses or any time the sound drops below a certain volume level. It’s fantastic for cleaning up the "dead air" between words but does absolutely nothing for the noise that's lurking underneath your speech.
Using the right tool for the job is key. For more detailed answers to specific issues, our complete FAQ page offers further guidance.
Ready to transform your audio from noisy to pristine in just a few clicks? SoReel uses advanced AI to automatically remove background noise, normalise volume, and deliver studio-quality sound for all your videos. Try it for free at https://soreel.app.
Article created using Outrank