A Creator's Guide to Improve Video Quality Online with AI

Discover how to improve video quality online using our step-by-step guide. Learn AI upscaling, audio optimisation, and platform-specific export settings.
If you're looking to improve your video quality online, slapping on a simple filter just won't cut it anymore. The real secret lies in a smart workflow that uses AI-powered tools to handle the heavy lifting: upscaling resolution, cleaning up messy audio, and getting rid of distracting watermarks before you even think about exporting. When you pair that with platform-specific settings for TikTok or Instagram, your content won't just look good—it'll sound professional and stay sharp, even after those notorious compression algorithms do their thing.
High-Quality Video Isn’t Just an Option—It’s the Expectation
In the fast-moving world of social media, high-quality video is now the baseline, not a bonus. Platforms like TikTok and Instagram have completely rewired our brains, training us to expect crisp visuals and clear sound as standard. A brilliant idea can fall flat if the execution isn't there; it's the technical polish that makes people stop scrolling.
Think about it—we've all become sophisticated media consumers. In 2024, an estimated 85% of UK homes had at least one streaming subscription, with people spending nearly 4.8 hours a day watching video content. That much screen time has unconsciously raised the bar. Viewers have little patience for grainy, pixelated, or hard-to-hear videos.
The Hidden Cost of Poor Quality
Low-resolution footage or muffled audio does more than just look bad; it can instantly cheapen your message and make your brand seem less credible. It suggests a lack of care and can be all it takes for someone to swipe away in the first few seconds. This is precisely why knowing how to improve video quality online is one of the most valuable skills a creator can have today.
This guide walks you through a complete, practical workflow built for creators who want results. We'll cover every step, from prepping your raw files to hitting "upload".
Here's what you'll learn:
- Preparing Your Footage: How to pick the right source file and cleanly remove watermarks to give yourself the best possible starting point.
- AI-Powered Enhancement: Using AI to intelligently upscale resolution, get rid of noise, and fix colours for that polished, professional look.
- Audio Optimisation: Mastering the techniques to erase background noise and make sure every word is heard loud and clear.
- Platform-Specific Exports: Nailing the perfect export settings so your videos look just as good on TikTok and Instagram as they do on your computer.
The gap between amateur and pro-level content is often just a few small technical details. By mastering an online enhancement workflow, you gain a massive competitive advantage without needing a film degree or expensive, complicated software.
By the end of this guide, you'll have the practical skills to turn your raw clips into high-impact content that truly grabs your audience. Whether you're a marketer trying to scale campaigns or a creator building a community, these steps will make a difference you can see and hear.
To find a plan that fits your workflow, you can check out our pricing for video enhancement at https://soreel.app/pricing.
Getting Your Footage Ready for a Makeover
Before you jump into the magic of AI enhancement, you've got to do a little prep work. The final result you get from any online tool is massively dependent on the quality of the video you feed it. I always think of it like cooking – you can't expect a Michelin-star meal if you start with dodgy ingredients. AI can work wonders, but giving it the cleanest possible footage to start with makes all the difference.
This isn't about diving into a complex video editor. It’s a simple but crucial process: pick the best version of your video, clean up any clutter, and get a handle on its technical specs. Skipping this part often leads to disappointing results, as the AI has to struggle with flaws that could have been easily avoided. A few minutes of prep here will save you a lot of headaches later.
Always Start with the Best Possible Source File
Here’s the number one rule in video enhancement: always, always use the highest quality version of the footage you can get your hands on. Every single time a video is compressed, saved, or uploaded to a platform, it loses a bit of data. This is called "generation loss," and it's what causes those fuzzy artefacts and pixelation that get worse with every copy.
If you filmed it yourself, go back to the original file straight off your camera or phone. That's pure gold. If you're working with a video from someone else, ask them to send you the source file directly instead of just grabbing it from their Instagram feed.
- Original Camera File: This is your best-case scenario. It has the most detail and the least compression.
- Social Media Download: Honestly, treat this as a last resort. Platforms like TikTok and Instagram apply their own aggressive compression, which really hammers the quality.
- Screen Recording: Sometimes you have no other choice. Just be aware that screen recordings can introduce their own quirks, like choppy frame rates. If you have to go this route, make sure you capture it at the highest resolution you can.
Look, even if a compressed download is all you've got, don't panic. Modern online enhancers are built to handle less-than-perfect files. The main goal here is just to avoid adding yet another layer of compression before you even begin.
Deal with Watermarks and Burnt-In Text First
One of the biggest roadblocks to a clean-looking video is a pesky watermark or some text that's permanently stuck on the screen, like a username or a timestamp. These aren't just simple overlays; they're literally baked into the video's pixels. If you try to upscale a video with a watermark, the AI will just make the watermark look sharper and even more distracting.
For the best results, you need to get rid of these before you upscale. Using a dedicated online watermark removal tool is the way to go. These tools are pretty clever – they don't just blur the spot. They analyse the surrounding pixels to intelligently reconstruct what the video should look like underneath, creating a clean slate for the upscaler to work on. This ensures a much more professional and seamless finish.
Figure Out Your Technical Starting Point
Finally, take a quick second to understand the technical details of your source file. You don't need to be a video engineer for this; it’s just about knowing what you're working with so you can set realistic goals. You can usually find this info by right-clicking the file and looking at its "properties" or "info."
Check for these three things:
- Resolution: The video's size in pixels (e.g., 1280x720 or 1920x1080). This tells you how much of a leap it is to get to your target, like 4K (3840x2160).
- Frame Rate (fps): How many images, or frames, are shown per second. You'll typically see 24, 30, or 60 fps. Keeping this consistent is key for smooth motion.
- Bitrate: This is how much data is used for each second of video. A higher bitrate usually means better quality and a bigger file.
Once you know this baseline, you can make smarter choices. For instance, if you see your video is only 720p, you'll understand why upscaling it to 4K is such a game-changer. This quick check turns the whole process from guesswork into a clear, targeted workflow.
The Core Workflow: AI Upscaling and Denoising
With your footage prepped and clean, it's time to get to the heart of the matter—the actual magic of improving your video quality online. This is where AI tools step in, taking what you have and turning it into something far more polished and professional. We’re going beyond simple edits here and into the realm of intelligent enhancement, fixing everything from blurry resolution to distracting visual noise.
This isn’t about just slapping a filter on your video. It’s a much deeper process where the software analyses and reconstructs your footage, pixel by pixel. The aim is to breathe new life into your clips, whether that's an old family video shot on a camcorder or a recent interview filmed in a less-than-ideal, dimly lit room.
The core of this workflow really boils down to three key AI functions:
- Resolution Upscaling: Intelligently boosting the pixel count of your video.
- Denoising and Deinterlacing: Getting rid of that annoying visual grain and fixing old-school scan lines.
- Colour and Contrast Correction: Automatically adjusting tones to make your video pop.
From Blurry to Brilliant: AI Resolution Upscaling
Resolution upscaling is probably the single most dramatic improvement you can make. It’s the process of taking a lower-resolution video—say, a 720p clip you’ve downloaded—and transforming it into crisp 1080p, 2K, or even 4K.
Now, this isn't the old-school method of just stretching the pixels, which always made everything look blocky and horrible. Modern AI upscaling is far more sophisticated. The algorithms have been trained on millions of images and videos, so they can analyse the content of each frame and intelligently predict what the missing pixels should look like. The result? It adds new, realistic detail that simply wasn't there before.
This simple workflow shows how to get your footage ready for the best possible AI results.
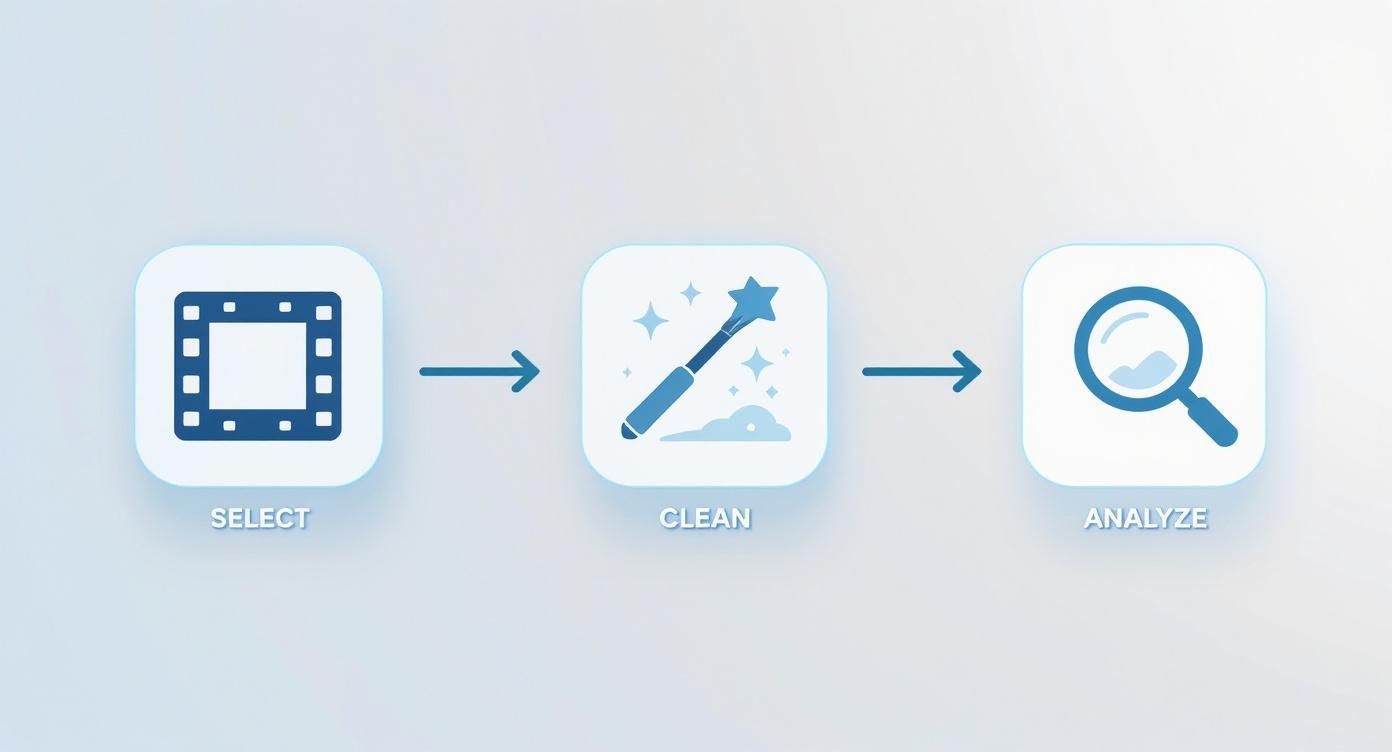
As you can see, selecting the right source, cleaning it up, and understanding its properties are fundamental steps before you even think about enhancement.
Think about an old family video from the 90s. Upscaling can suddenly bring faces into focus, make text on background signs legible, and introduce a level of definition that makes it feel like it was shot yesterday. For anyone working with archival footage or user-generated content, this is an absolute game-changer.
Cleaning Up the Noise and Grain
Ever filmed in low light and ended up with footage that looks speckled and grainy? That’s called digital noise, a common headache that can instantly make a video look amateurish. On older footage, you might also see interlacing artefacts—those jagged horizontal lines that appear during movement.
AI denoising tools are built specifically to fix these problems without destroying the detail. They’re clever enough to tell the difference between unwanted noise and the actual textures in your shot, so they can smooth out the grain while keeping important details sharp.
This is a huge help for creators who often shoot on the go with smartphones. That interview in a dimly lit café or footage from a night-time event can be cleaned up in minutes, rescuing what might have otherwise been unusable footage. We've got more tips for handling tricky footage on our blog; check out our deep dives into specific techniques at https://soreel.app/blog.
Making Your Colours Pop
The final piece of the AI puzzle is sorting out the colour and contrast. Raw footage often looks a bit flat, washed-out, or has a weird colour cast from the lighting. You could spend hours manually colour grading in complicated software, but AI-powered tools can get you 90% of the way there with a single click.
By analysing the entire video, the AI can automatically balance the whites, deepen the blacks, and enhance saturation to make the colours look vibrant and true-to-life. It’s like having a professional colourist on call, ensuring your visuals are consistently engaging.
This intelligent colour correction is also brilliant for maintaining a consistent look, especially if you’re cutting together footage from different cameras. Viewers have come to expect this level of quality. In fact, the UK video streaming market hit around USD 13.99 billion in 2024 and is projected to climb to USD 45.59 billion by 2030. That growth is driven by an audience that values a high-quality visual experience, pushing creators to step up their game.
When you bring all these AI capabilities together, you get a powerful, repeatable workflow. You’re not just making small tweaks; you’re fundamentally rebuilding your video to meet modern standards. This lets you repurpose old content, salvage imperfect shots, and make sure every video you publish looks its absolute best.
Optimising Audio for a Professional Finish
While incredible visuals might catch someone's eye, it’s bad audio that will make them scroll right past. Sound is the unsung hero of great content; it’s the difference between a video that feels amateur and one that feels polished and professional. If your audience has to struggle to hear you over a humming air conditioner or distracting echo, they won't stick around for long.
The good news is you don’t need a sound engineering degree or a lorry full of expensive gear to get clean, professional-sounding audio anymore. The same AI that works wonders on your visuals can completely transform your audio tracks, turning noisy, muffled recordings into something crisp and clear. This is a non-negotiable step if you want to improve video quality online because it directly shapes the viewer's entire experience.
So many creators fall into the trap of thinking their camera's built-in microphone is "good enough." The reality is, those mics are designed to pick up everything – the quiet buzz from your fridge, the faint echo from the walls, you name it. This is precisely where AI-powered audio tools become a game-changer.
Erasing Unwanted Background Noise
The most common culprit ruining good videos is background noise. It’s that subtle hiss you can't quite place, the neighbour's dog barking in the distance, or the low rumble of traffic outside. These sounds muddy your voice and instantly make your production feel low-budget.
Modern audio enhancement tools are trained to pinpoint and isolate these distracting frequencies. They can intelligently separate your voice from the chaos in the background, surgically removing the noise without making you sound robotic or unnatural.
Let’s look at a common scenario:
- The Problem: You’ve just recorded the perfect take for your latest tutorial, but you can hear the whirring fan from your computer throughout the entire clip.
- The AI Solution: The tool analyses the sound, identifies the consistent frequency of the fan, and simply lifts it out, leaving only your voice behind.
This isn’t just about making things sound a bit nicer; it’s about making sure your message is heard, loud and clear, without anything getting in the way.
Poor audio is far more distracting than poor video. Your audience might put up with a slightly grainy image, but they have zero patience for audio that’s hard to understand. Spending just a few minutes on an AI audio clean-up offers a massive return on viewer retention.
Making Every Word Crystal Clear
Beyond just killing background noise, AI audio tools are brilliant at enhancing vocal clarity. Often called speech enhancement, this process focuses on boosting the specific frequencies of the human voice. It’s like having an expert audio engineer on hand to automatically tweak the equaliser and make your voice really stand out.
This is a lifesaver in situations where the original recording is a bit muffled or distant. Say you filmed an interview in a large, echoey hall; the AI can dial back that cavernous reverb and bring the voices forward, making them sound like they were recorded in a proper studio. It also smooths out inconsistent volume levels, so you don't have moments where dialogue is too quiet to hear, followed by sudden loud peaks.
Here’s a quick look at what AI-powered vocal enhancement can fix for you:
| Audio Issue | How AI Fixes It |
|---|---|
| Muffled Dialogue | Boosts key vocal frequencies for crispness and presence. |
| Echo and Reverb | Identifies and reduces room reflections, making speech sound closer and more direct. |
| Inconsistent Volume | Normalises the audio track, raising quiet parts and lowering loud ones for a smooth listening experience. |
| Plosives & Sibilance | Softens harsh 'p' and 'b' sounds (plosives) and sharp 's' sounds (sibilance) that can be jarring. |
By tackling these common problems for you, AI elevates the entire feel of your video. Clean, clear, and balanced audio shows your audience you respect their time and makes your content feel far more authoritative and engaging. It’s a simple final touch that completes the professional transformation of your footage.
Mastering Export Settings for TikTok and Instagram
You’ve put in the hard graft. Your footage is prepped, watermarks are gone, and you’ve used AI to upscale, denoise, and balance the audio. The video looks and sounds incredible on your computer.
Then you upload it to TikTok or Instagram, and… it’s a pixelated, compressed mess.
This is a painfully common experience for creators, and it all comes down to the final, crucial step: your export settings. Every social platform has its own secret sauce for video compression, and they will re-compress your video no matter what. The goal isn't to avoid compression entirely, but to give their algorithms a file that's so perfectly formatted it survives the process with its quality intact.
Getting this right is a vital part of learning how to improve video quality online because it protects all the hard work you’ve just put in.
Why a One-Size-Fits-All Export Fails
Sending the same video file to TikTok, Instagram Reels, and YouTube Shorts is a recipe for inconsistent, often disappointing, results. Each platform has its own preferences for resolution, bitrate, and file type.
For instance, giving Instagram an unnecessarily high-bitrate file can actually trigger heavier compression, making your video look worse than if you’d uploaded a smaller, optimised file. The key is to tailor your export to each platform's sweet spot. This means you’re not just exporting a video; you're strategically preparing it for its final destination.
The Ideal Export Blueprint for TikTok and Reels
While there are minor differences, TikTok and Instagram Reels share very similar DNA when it comes to video. They both prioritise vertical, mobile-first content and have comparable technical demands.
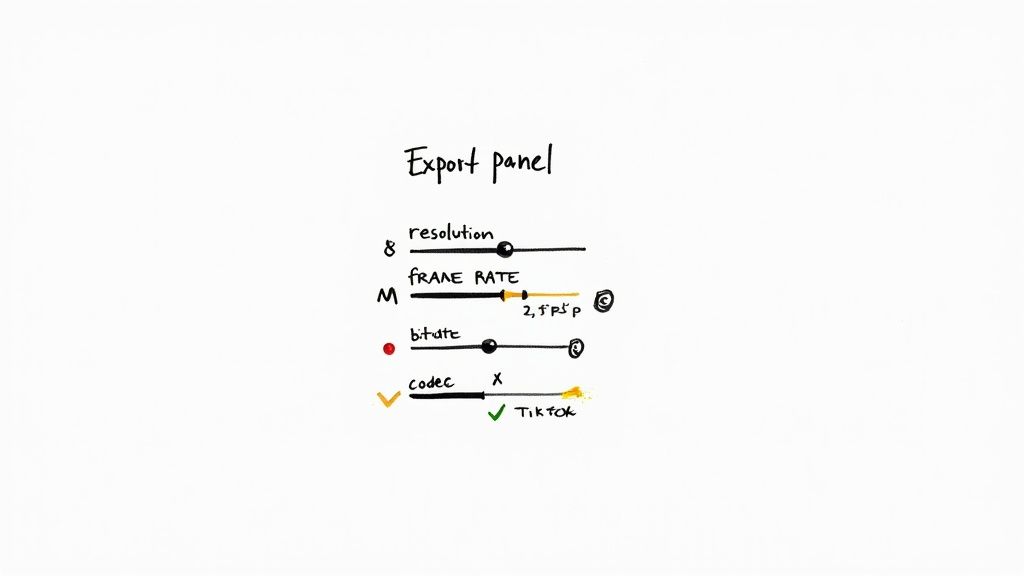
Here are the core settings you should be aiming for:
- Resolution: Stick to 1080x1920. Even if you've upscaled to 4K, exporting in 1080p is the current gold standard. Uploading in 4K often leads to unpredictable and harsh compression.
- Frame Rate: Export at 30 frames per second (fps). While 60 fps can look smoother, it isn’t always supported consistently and the larger file sizes can get compressed more aggressively.
- Codec: The H.264 (or AVC) codec is the undisputed champion for social media. It hits that perfect balance between quality and file size and is universally compatible.
- File Format: Always choose .MP4. It's the standard format that works flawlessly everywhere.
Your goal is to feed the algorithm a file it loves. A 1080p, 30fps video in an H.264 MP4 container is the 'comfort food' of social media compression engines. It’s what they are designed to process efficiently with minimal quality loss.
Getting the Bitrate Just Right
Bitrate is where many creators stumble. It determines how much data is in each second of video—too low, and your video looks blocky; too high, and you're just inviting platforms to crush your file.
For 1080p footage destined for TikTok or Instagram, a variable bitrate (VBR) between 10-15 Mbps (megabits per second) is the sweet spot. This provides plenty of data for a crisp image without creating a huge file that their servers will fight against.
The audience's viewing habits reflect this demand for quality. Between 2015 and 2024, Subscription Video-on-Demand (SVoD) services in the UK surged by 240%, now reaching over two-thirds of households. This shows consumers are accustomed to high standards. You can find more insights about this trend in UK streaming habits.
Optimal Export Settings for Social Media Platforms
To make your life easier, here’s a quick-reference guide comparing the ideal settings for today's top short-form platforms.
| Setting | TikTok | Instagram Reels | YouTube Shorts |
|---|---|---|---|
| Resolution | 1080 x 1920 | 1080 x 1920 | 1080 x 1920 |
| Frame Rate | 30 fps | 30 fps | 24, 30, or 60 fps |
| Bitrate (VBR) | 10-15 Mbps | 10-15 Mbps | 10-20 Mbps |
| Codec | H.264 (AVC) | H.264 (AVC) | H.264 (AVC) |
| Audio Codec | AAC | AAC | AAC-LC |
| Audio Sample | 48 kHz | 44.1 kHz | 48 kHz |
Mastering these platform-specific settings is the final piece of the puzzle. It ensures that every ounce of effort you put into enhancing your video pays off, delivering a final product that looks clean, professional, and ready to stop the scroll.
Frequently Asked Questions
When you first dive into improving your videos, it’s completely normal to have a few questions. The world of AI enhancement, codecs, and bitrates can sound complicated, but the core ideas are actually quite simple once you get started. This section answers the most common queries we hear from creators, giving you the clarity you need to move forward.
Think of this as tying up the loose ends. Getting these points straight will help you set the right expectations, handle any snags, and just generally make smarter choices when you're polishing up your footage.
Can AI Really Fix Very Low-Quality Videos?
This is the big one, and the short answer is yes—but with a small catch. Today's AI video enhancers are genuinely impressive. They can take a blurry, pixelated 480p clip and upscale it to a crisp 1080p or even 4K. The tech isn't just stretching the image; it's intelligently rebuilding the missing details.
However, the AI can't create information out of thin air. If a face in your original video is just a complete blur, the AI isn’t going to magically invent a crystal-clear portrait. It’s powerful, but it’s not magic.
What it excels at is:
- Sharpening up soft or blurry edges.
- Cleaning up those blocky compression artefacts.
- Smoothing out digital noise and graininess.
- Making colours pop with more vibrancy and accuracy.
So, while it might not turn a totally unusable clip into a Hollywood blockbuster, the difference is almost always dramatic. It can easily take old or poor-quality footage and make it look professional enough for any social media feed.
How Long Does Video Enhancement Usually Take?
This is a key consideration, and it really depends. There's no one-size-fits-all answer because the time it takes hinges on what you're asking the AI to do.
Here are the main things that influence processing speed:
- Video Length and Resolution: A 15-second, 720p clip is going to be way faster than a 10-minute, 1080p video. The more frames the AI has to analyse, the longer the job takes.
- Enhancements You've Picked: A straightforward denoising pass is quicker than a full 4K upscale combined with colour correction and audio sweetening. Each extra task adds to the clock.
- The Service's Workload: The raw power of the online tool matters. If you're using it at a peak time, you might find yourself in a slightly longer queue.
As a rough guide, a short one-minute clip might take a few minutes to process. A longer, more complex enhancement could take over an hour. Most platforms give you a time estimate and will ping you an email when your video is ready. For a more detailed breakdown, you can always check out our full FAQ page.
Will Online Tools Add a Watermark?
A crucial question for anyone serious about their content. Whether you get a watermark or not comes down to the service and the plan you’re on. Many online enhancers offer a free trial or a free tier, which is fantastic for giving the tool a test run. But almost without fail, these free versions will place a small watermark on your final video.
This is standard practice in the industry. It lets you see the incredible quality for yourself before you decide to subscribe. For any serious creator, marketer, or business, upgrading to a paid plan is a no-brainer.
Premium subscriptions always give you watermark-free downloads. It's a small investment for a clean, professional video that you can use anywhere without someone else's branding on it. Just be sure to check the features of your chosen plan to confirm you're getting the unbranded content you need.
Ready to transform your footage into professional, high-impact content? SoReel uses advanced AI to remove watermarks, upscale resolution, and perfect your audio in minutes. Paste a URL or upload a file and see the difference for yourself. Get started with SoReel today!