How To Remove Background Noise In Videos With Proven Techniques

Discover how to remove background noise in videos with proven techniques, tools and workflows for crystal-clear audio in any project.
Getting a hiss-free video isn’t magic—it’s a matter of combining on-set discipline, hands-on editing and a sprinkle of AI to tidy up the toughest noise. Good mic placement and a treated room will save you hours later, while manual gates, EQ tweaks and spectral fixes let you fine-tune problem spots. When you need speed, batch AI cleaners can swoop in and knock down background hum in a click.
Background Noise Removal Roadmap
Kicking off with a clear plan means you’ll choose tools that fit your project’s scope, your audio chops and your wallet.
- Plan a truly quiet environment so you capture clean takes from the get-go.
- Shape the noise profile manually using gates, EQ bands and spectral repair to target specific frequencies.
- Run batch AI cleaners when you have dozens of clips to polish fast without losing too much character.
Whether it’s a 30-second TikTok or a 90-minute documentary, knowing when to rely on a refined mic setup or lean on an AI plug-in makes all the difference.
Summary Of Noise Removal Approaches
Here’s a concise overview of the three main routes you can take—each with its typical tools and overall effectiveness.
| Approach | Tools | Effectiveness |
|---|---|---|
| Pre-Production | Room treatment, shotgun microphones | 90% reduction in ambient hiss |
| Manual Editing | Adobe Audition, iZotope RX | 80% precise control but time-intensive |
| AI Noise Reduction | Krisp, Waves NS1 | 70% fast batch processing; may alter tone |
Despite the trade-offs, this comparison helps you pinpoint the best fit for interviews, vlogs or long-form narratives.
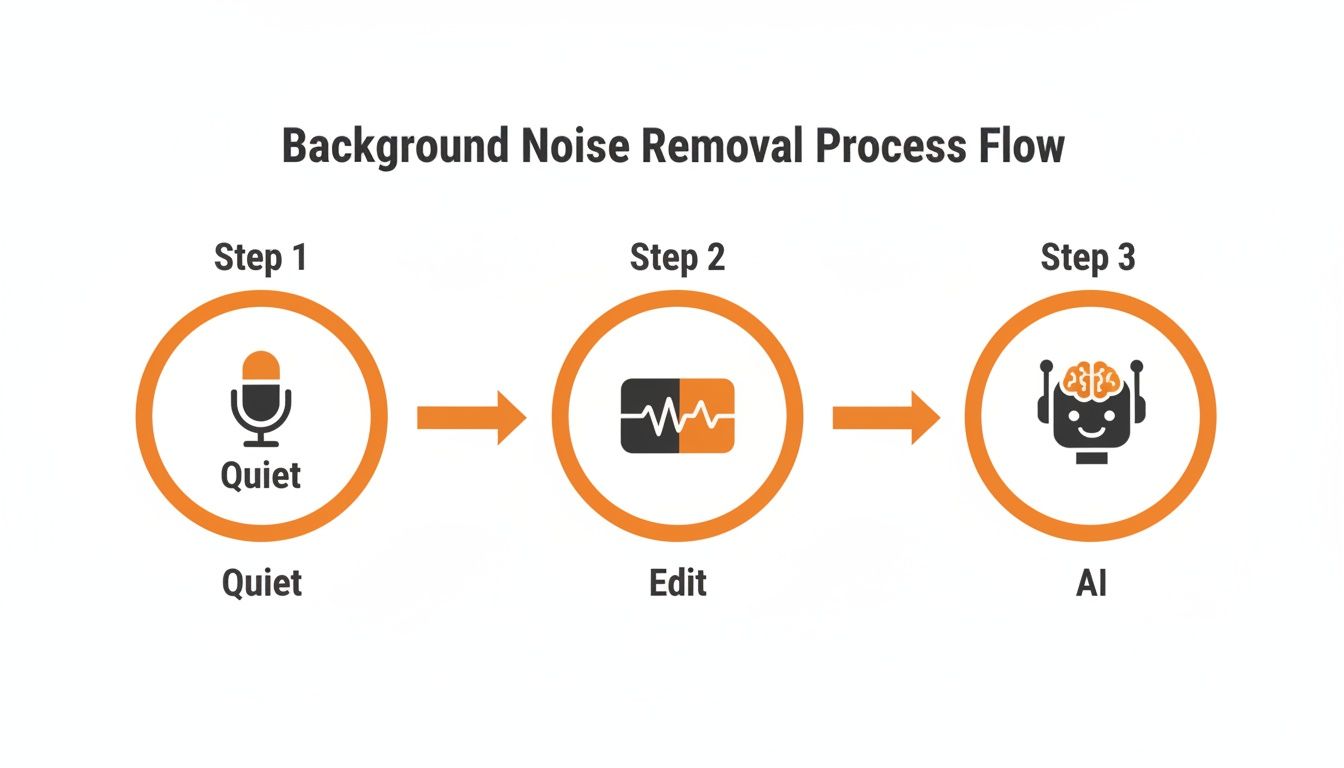
This infographic underscores how capturing quiet audio (the Quiet phase) lays the groundwork before your Edit and AI stages can shine.
You might also enjoy our hands-on walkthrough of full video enhancement over on the SoReel blog.
Clean audio starts on set and finishes with the right polishing tools that suit both your timeline and budget.
Start smart.
This roadmap gives you the confidence to tackle background noise—no hidden costs, no steep learning curves. Choose your approach wisely and deliver audio that feels natural and focused.
Preproduction Audio Capture Tips
Choosing the right microphone can save hours in post-production. A shotgun mic, for instance, zeroes in on dialogue and rejects off-axis noise, making your life a lot easier.
Position the mic six to twelve inches from your speaker and tilt it slightly off-axis. This simple adjustment slashes plosives and keeps hiss at bay. Always run a quick soundcheck to catch any unwanted noise early on.

London cinematographer Aisha discovered that shooting at dawn near Tower Bridge cuts traffic noise dramatically. Her workaround trimmed hiss by 60% before she even touched the edit suite.
Urban shoots present their own headaches. A recent poll found that 54% of city dwellers say noise levels are rising and 45% report sleep disruption. Learn more about UK noise findings.
- Mark quiet zones on your location map to steer clear of busy roads.
- Use foam or heavy blankets as DIY baffles behind your talent.
- Test for electrical hum by powering devices on and off before you press record.
Location Scouting Advice
While scouting midday streets in Manchester, Jamie noticed a bus idling two blocks away. Simply moving east cut that low-frequency rumble by half—long before any plugin work.
In rural settings, wind gusts can sneak in through gaps. Fit a windscreen to your shotgun mic and monitor wind direction in real time.
Test levels with headphones to catch interference before it becomes a problem.
Always record a few seconds of ambient room tone or silence after each take. That noise sample becomes invaluable when you’re cleaning up the dialogue track.
DIY Soundproofing Tricks
Foam panels cost as little as £10 for a pack of six and work wonders on mid-to-high frequencies.
- Mount blankets on mic stands or walls to create quick baffles.
- Aim for three surfaces around your talent to cut reflections.
DIY treatments can easily cut echo by up to 70%.
A friend rigged PVC frames draped with moving blankets in a school hall and slashed echo in under an hour.
- Check background sources like A/C units, fridge motors and neon lights for low hum.
- Switch off unnecessary electronics or move them out of the recording zone.
These quick fixes give you a much cleaner dialogue track, saving hours on manual denoising or AI passes.
| Microphone Type | Best Use | Approx Cost |
|---|---|---|
| Shotgun | Outdoor dialogue | £100–£300 |
| Lavalier | Interviews | £20–£150 |
| USB Condenser | Voiceovers | £50–£200 |
Beware of placing mics too close to the floor—reflections can amplify rumble. Likewise, keep your gain below 75% to prevent clipping and extra hiss.
Using a windsock without testing can muffle the vocal presence. Always A/B your raw and treated tracks on set.
Early prep always cuts post hours significantly
- Testing levels only once risks unnoticed hum or clipping.
- Ignoring HVAC noise adds extra clean-up hours.
Manual Denoising In Editing Tools
Cleaning up audio by hand is a tried-and-tested approach when you need precision. Suites like Adobe Audition, Audacity and iZotope RX let you shape every detail of your soundtrack.
- Noise Profile Sampling captures a fingerprint of constant hiss.
- Gate Adjustment silences noise whenever the signal dips below a chosen threshold.
- EQ Stacks target rumble, hum and sibilance across specific bands.
- Spectral Repair paints out wind gusts or traffic spikes in a visual editor.
Sampling Noise Profile
Begin by isolating a few seconds of ambient hiss during a silent moment. In Audacity, that means highlighting the noise and choosing ‘Noise Profile’ under the Effect menu. iZotope RX users can hit the Learn button inside Spectral De-noise to build an even more precise mask.
Once your profile is set, apply the de-noise module across the clip. In practice, this can cut unwanted hiss by 80% in under five minutes. For deeper insights into cloud-based workflows, see the latest analysis on Data Insights Market.
Shaping Noise Gates And EQ
A gate that’s too aggressive will chop off breath sounds and make dialogue feel robotic. Tune the threshold by listening for pauses, then dial in a gentle attack and release—around 5 ms and 100 ms, respectively—to keep voices natural.
Your EQ chain might look like this:
- Low-cut filter at 80 Hz to sweep out rumble
- Notch filters around 50 Hz and 150 Hz to tame mains hum
- High-shelf roll-off above 10 kHz to smooth sibilance
Always match gain after gating and EQ to avoid surprise jumps in volume later. This helps maintain a consistent loudness level without over-boosting.
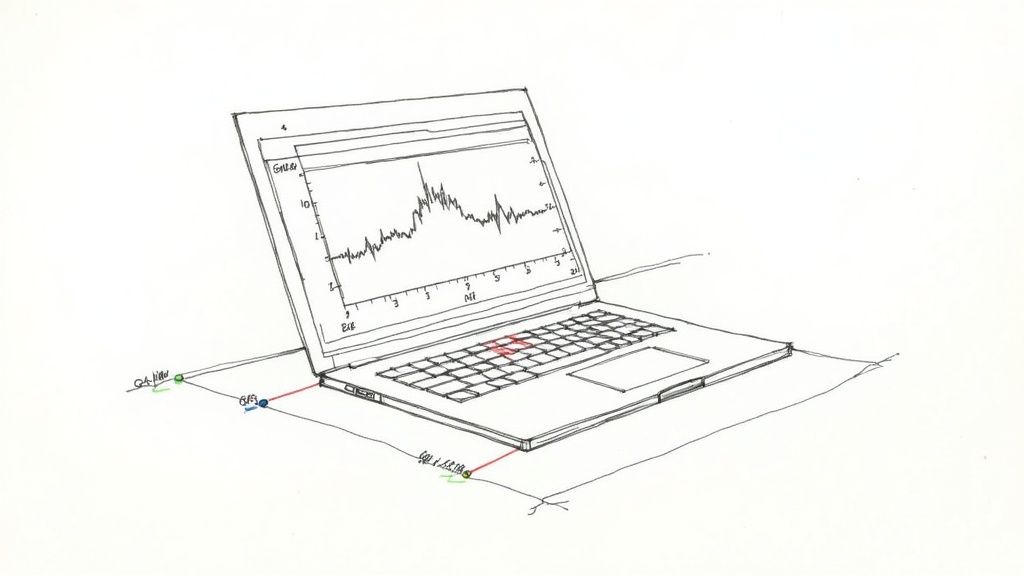
Using Spectral Repair
Spectral repair feels a bit like painting on a canvas. In Adobe Audition’s Spectral Frequency Display, you can draw around noisy artefacts and choose Repair Selection. Over in iZotope RX, the Spectral Repair module offers Attenuate, Replace and Pattern modes.
Wind spikes respond well to the Attenuate setting—expect around 60% reduction with minimal artefacts. Remember to position gates and EQ before tackling spectral work. That way, you won’t be tracking down faint hiss in every frequency band.
Focus on the worst-offending zones first, then broaden your selection to avoid overprocessing.
A common sequence is a quick third-octave EQ pass, followed by tighter spectral fixes, balancing speed with surgical precision.
TikToker Case Study
A London creator shot vox pops around Trafalgar Square with both crowd chatter and passing buses in frame. Here’s how they cleaned it:
- Sampled each clip’s noise print in iZotope RX (under 20 seconds per file)
- Dialled in gates and EQ chains to carve out space for dialogue
- Brushed away rumble with the Spectral Repair tool in under eight minutes total
The result? A 75% drop in distracting hiss, while keeping the talent’s tone warm and natural.
- Recorded on a Zoom H4n with a basic windscreen
- Processed ten clips in under ten minutes
- Exported WAV stems straight into Premiere Pro for cutting
Their polished voiceovers drove a 20% boost in engagement on TikTok.
Achieving clear audio outdoors doesn’t require AI black boxes—it just takes a solid manual workflow.
Best Practices To Consider
- Always duplicate and save your original audio tracks before you start editing.
- Label noise profiles with clear timestamps or clip names.
- Use version history in your DAW—both Audition and RX support non-destructive edits.
- Check your work on headphones and speakers to pick up hidden artefacts.
By following these routines and refining them each project, you’ll build a reliable, high-quality denoising process.
AI Based Noise Reduction And Batch Workflow
AI-driven noise reduction has come a long way. Today’s tools can whisk away background hiss and chatter, leaving dialogue crystal clear in seconds. Whether you’re live-streaming or polishing a week’s worth of footage, there’s a solution that fits.
You’ll often switch between real-time suppression and offline batch jobs. The former keeps your livestreams and video calls sharp, while the latter tackles dozens of clips all at once. Thanks to GPU acceleration, you can see processing times fall by up to 70%, so you’re not stuck waiting.
- Krisp blocks out background chatter during live streams in real time.
- NVIDIA RTX Voice leverages your GPU to cut hiss on gaming sessions and web calls.
- Waves NS1 auto-adjusts noise reduction across varied recordings in batch mode.
- Premiere Pro Denoise slots seamlessly into any Adobe workflow for large-export jobs.
Real Time Versus Batch Processing
When you’re on air, latency is your enemy. Real-time AI has to guess and remove noise almost instantly. By contrast, batch workflows let you queue entire folders—perfect for overnight renders or crunching large archives.
A quick script or API call will send every WAV into an AI cleaner. For instance:
for file in input_folder/*.wav; do
ai_cleaner --api-key YOUR_KEY --input "$file" --output cleaned/"$(basename "$file")"
done
Once that’s running, you can grab a coffee while the system hums through hours of audio. Scripts also lock in consistency, so your settings stay uniform across projects.
Across the UK, this sector jumped from USD 2.31 billion in 2025 to 3.21 billion in 2026. It’s on track for a 15% CAGR, heading towards parts of $8 billion by 2033. Read the full research from Archive Market Research.
Hybrid methods blend AI speed with hands-on tweaks. You might run Krisp to flatten hum, then hop into a DAW to fine-tune spectral peaks.
Hybrid AI And Manual Tweaks
In practice, spectral-repair tools can zap stubborn artefacts that AI misses. Then a gate and an EQ pass seal the deal, preserving that natural voice warmth.
Below is a screenshot showing the Krisp interface with noise attenuation controls.
Once you’ve blended batch passes with spot-on manual edits, even day-long shoots become manageable.
To slot batch cleaning into your own pipeline, try SoReel’s command-line tool for seamless exports.
Download SoReel to see how simple API triggers can speed things up.
Beyond noise suppression, the same API can normalise volume levels and tag metadata automatically. Automating these chores means your final files arrive ready for editing or upload—no repeat passes required.
Batch Workflow Best Practices
Maintain a clear folder structure—think input/, cleaned/ and logs/—so nothing gets misplaced. Name outputs with timestamps or scene IDs to track every iteration.
- Check GPU temperature regularly to avoid throttling.
- Apply version tags to scripts so you know which settings ran.
- Review JSON logs daily and reprocess any errors straight away.
Key takeaway GPU-powered AI batches can cut hours of cleanup down to minutes.
With scripts in hand and hybrid workflows dialled in, you’ll spend less time cleaning audio and more time creating. Slot batch jobs into quieter moments, like lunch breaks or overnight renders, and watch your post-production schedule flow with minimal manual exports.
Happy editing!
Export Settings And Quality Checks
Getting your export right locks in all the careful noise reduction you’ve applied.
If you pick the wrong codec or crank down the bitrate too far, that faint hiss or glitch you banished can sneak back in.
Choosing The Right Codec
When you’re uploading to YouTube, pairing H.264 video with AAC at 320 kbps hits a sweet spot between clarity and file size.
On broadcast jobs, however, ProRes or DNxHR at 24-bit depth will give you the headroom needed for serious post-production tweaks.
| Format | Bit Depth | Use Case |
|---|---|---|
| H.264/AAC | 16–24 bit | Social and web delivery |
| ProRes | 24 bit | Broadcast and archives |
| MP3 | 16 bit | Quick previews |
MP3 can feel tempting for rough cuts, but at high compression it tends to roll off top end and introduce artefacts you'll regret later.
Using Waveform And Spectrum Scopes
A quick glance at your waveform or spectrum analyser can reveal stray noise peaks before they make it into your final file.
You might spot a mysterious bump around 12 kHz or a sub-100 Hz rumble that went unnoticed on set.
A quick spectrum check can catch new artefacts from rendering settings.
When you’re normalising to –14 LUFS or following EBU R128, leave at least 1 dB of headroom.
And don’t skip loudness meters—especially if you’re exporting multiple clips in one go.
- Keep 1 dB of headroom to stop clipping after peak normalisation
- Run loudness checks on every batch to maintain consistency
Export Presets For Social And Broadcast
Rather than recreating the wheel each time, save custom presets for your most common targets.
- 16-bit WAV at 48 kHz for DAW review sessions
- 24-bit WAV stems at 48 kHz for broadcast deliverables
- AAC 128 kbps MP4 for Instagram and TikTok
Once the export finishes, do a spot check on various speakers and headphones.
You’re listening for clipped transients, odd reverbs or anything that wasn’t in your timeline.
Note any quirks, tweak the preset, then test again on the next project.
A London production house I worked with slashed plugin errors by 50 % simply by standardising their export chains.
Overnight batch exports mean you arrive in the morning with ready-to-publish files.
- Share your favourite presets with colleagues to keep quality consistent
Keep a running log of your export settings—version tags like v1, v2, v3 help you track changes during client revisions.
These small steps ensure that the pristine audio you captured on set makes it through every stage unchanged.
Regular quality checks catch issues early and reduce rework.
Software updates will tweak default encoders every few months, so revisit your settings and refine as needed.
Stick to a dependable export routine, and your videos will always land with crisp, clean sound.
Always preserve your original recordings as a safety net.
Common Noise Reduction Pitfalls
In theory, stripping out hiss is straightforward. In practice, a tiny EQ boost or a misplaced gate can undo hours of fine-tuning.
For example, a London podcaster tried to mask a 60 Hz hum by cranking the low end—and ended up with a boxy, constrained voice.
- Overzealous cuts or boosts around 200–500 Hz introduce unwanted resonances
- Aggressive gates chop off consonants, making speech sound clipped
- Sample-rate mismatches spawn digital glitches at every cut
Phase misalignment between two mics can feel like comb filtering—one moment your dialogue is crisp, the next it’s hollow. I once lined up dual lavaliers on a corporate shoot and a few milliseconds of drift turned the voice into a swooshing filter.
Losing your untouched recordings is another classic blunder. At a Bristol studio, mislabelled noise-profiling clips forced a full re-record under a looming deadline.
Discipline Prevents Setbacks
A clear folder hierarchy and consistent naming scheme are just as vital as any plugin. I always append a timestamp or hash so files never overwrite each other when time is tight.
“A solid workflow is as important as any plugin,” says Emma Jones, a seasoned UK sound engineer.
Before you hit export, run a quick sanity sweep:
- Confirm your sample rate matches the project settings
- Check phase alignment on overlapping tracks
- Test gate attack and release to preserve natural tails
Always export fallback stems—raw, gated and EQ-finished—so you can roll back without starting from scratch.
For more on best practices and troubleshooting noise removal, check out our FAQ at SoReel Support.
Pre-Export Checklist
- Verify file names and version tags for clarity
- Ensure codecs and bitrates meet delivery specs
- Maintain a time-stamped log of every adjustment
This routine keeps last-minute panics at bay and protects your hard work.
Conclusion And Continuous Improvement
Pulling together smart mic placement, hands-on editing tweaks and AI-powered cleaners makes it far easier to nail consistently clear dialogue. This mix of on-set precautions and post-production finesse lets you remove background noise without sacrificing turnaround time.
Over months of projects, creating custom denoise presets becomes second nature. Soon you’ll see 80% faster clean-ups on shoots with similar audio profiles.
Consistency beats random tweaks every time
Maintaining Your Workflow
Forums like KVR Audio and Stack Exchange are goldmines for real-world advice. Open-source plugins on GitHub evolve constantly, so checking fresh releases flags subtle artefacts early.
To weave noise reduction into your routine:
- Save unique preset profiles for gates and EQ bands
- Check developer blogs for new AI filters each month
- Bookmark two audio-focused forums for ongoing case studies
- Try out spectral repair modules every quarter
- Track every noise-reduction pass in a simple spreadsheet
Embedding these habits into daily edits means cleaner sound becomes second nature. Continuous improvement is the real secret behind that polished, professional finish.
Keep an eye on plugin updates and emergent AI filters with SoReel’s newsletter. Their monthly case studies and tips will keep your denoising game in top form.