How to Remove Background Noise from Videos Like a Pro

Discover how to remove background noise from videos with our guide. Learn recording tips, AI tools, and advanced audio repair for crystal-clear sound.
Tackling background noise in your videos isn't a single action, but more of a three-pronged strategy. You start with prevention when you're filming, then move to AI-powered fixes for fast, effective results, and finally, for the really stubborn stuff, you roll up your sleeves for some manual editing. The golden rule is always to get the cleanest audio you can straight out of the camera, but it's a huge relief knowing that modern software can salvage your footage when real life gets in the way.
Why You Can't Afford to Ignore Bad Audio
Nothing screams "amateur" faster than a video filled with distracting background noise. It's the quickest way to lose your audience. A humming air conditioner, the rumble of traffic outside, or that annoying electronic hiss—these things don't just distract from your message; they actively sabotage it, often making viewers click away before you've even made your point.
This is a real-world problem for creators everywhere, especially those in bustling environments. Just look at the UK, where noise from transport is a constant headache. Over 20% of the population is regularly exposed to disruptive levels. If you're shooting content in a city like London or Manchester, you're in a constant fight to keep those sounds out of your final cut.
Audio is The Bedrock of Your Video
Think of it this way: viewers might tolerate a slightly shaky shot, but they have almost zero patience for audio they can't understand. Your audio quality is the bedrock of the entire viewing experience. When it's clean and clear, your message lands, and your audience stays locked in. When it's muddy, your credibility takes a hit.
The good news is that you don't need a million-pound studio to get professional-sounding audio anymore. The tools available today cover every skill level, from simple one-click AI enhancers to the kind of advanced surgical tools used by sound engineers.
This guide will walk you through a complete workflow, from start to finish, to help you achieve that pristine sound.
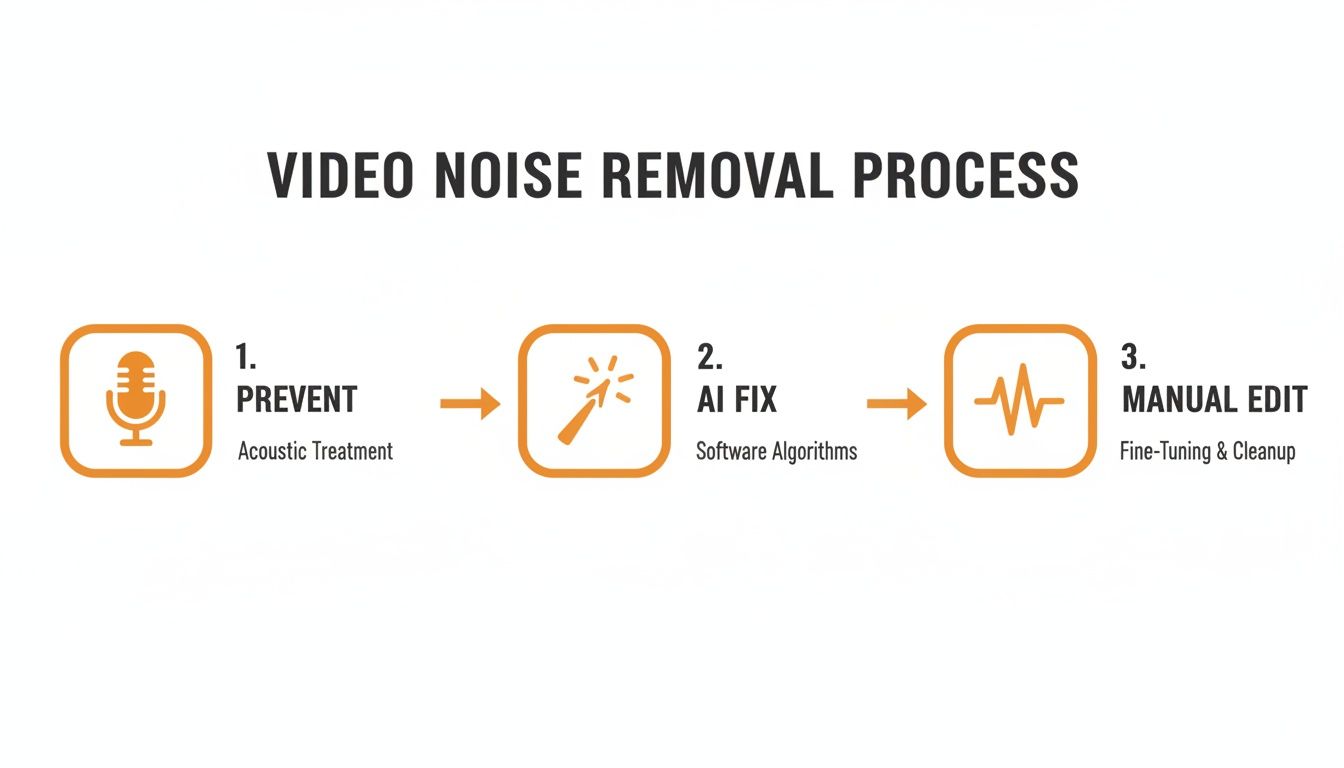
As you can see, the ideal path is to prevent noise first, lean on AI for the heavy lifting, and save manual editing for those truly tricky spots.
What's Inside This Guide
We're going to cover the full spectrum of audio cleanup techniques. You'll learn:
- How to Get It Right at The Source: A few simple but game-changing tricks to capture cleaner audio right from the get-go. This alone will save you countless hours in post-production.
- The Magic of AI: How to use automated tools like SoReel for lightning-fast noise reduction that delivers seriously impressive results, perfect for when you're on a tight deadline.
- Getting Your Hands Dirty: Diving into advanced techniques like spectral editing and equalisation (EQ) to surgically remove specific, isolated noises that other tools might miss.
To give you a clearer picture of what's available, here’s a quick breakdown of the main methods we'll be discussing.
Quick Guide to Noise Reduction Techniques
| Method | Best For | Difficulty | Tools Needed |
|---|---|---|---|
| Preventative Recording | Anyone, every time. The most effective method. | Easy | Basic gear (good mic, quiet space) |
| Quick Editor Fixes | Minor, consistent noise (e.g., light fan hum). | Easy | Built-in tools in video editors |
| One-Click AI Denoising | Fast turnarounds, complex noise, non-technical users. | Very Easy | SoReel, Adobe Podcast, CapCut |
| Advanced Manual Repair | Isolating specific sounds (coughs, clicks, sirens). | Hard | Audio editors (e.g., Audacity, iZotope RX) |
Ultimately, a combination of these methods will give you the most professional-sounding audio, transforming your videos from simply watchable to truly engaging.
Key Takeaway: Your journey to flawless audio always starts with prevention. But remember, with the right tools and techniques, even the most problematic recordings can be drastically improved, giving your videos the polished, professional feel they deserve.
Get it Right at the Source: Capturing Cleaner Audio
Honestly, the best way to remove background noise happens long before you ever click "import" in your editing software. While the tools we have today are incredible, they're really designed for rescue missions. Your first and most important job is to get the cleanest, clearest audio you possibly can during the actual recording. This ounce of prevention is worth a pound of cure, saving you hours of frustration and avoiding that weird, artificial sound you get from heavy-handed noise reduction.
Think of it like this: fixing noisy audio is like trying to unscramble an egg. You can mess with it, but you'll never get back to the original, pristine state. Nailing the audio at the source is like starting with a perfect egg—the final result is always going to be better.
Your Mic Matters More Than You Think
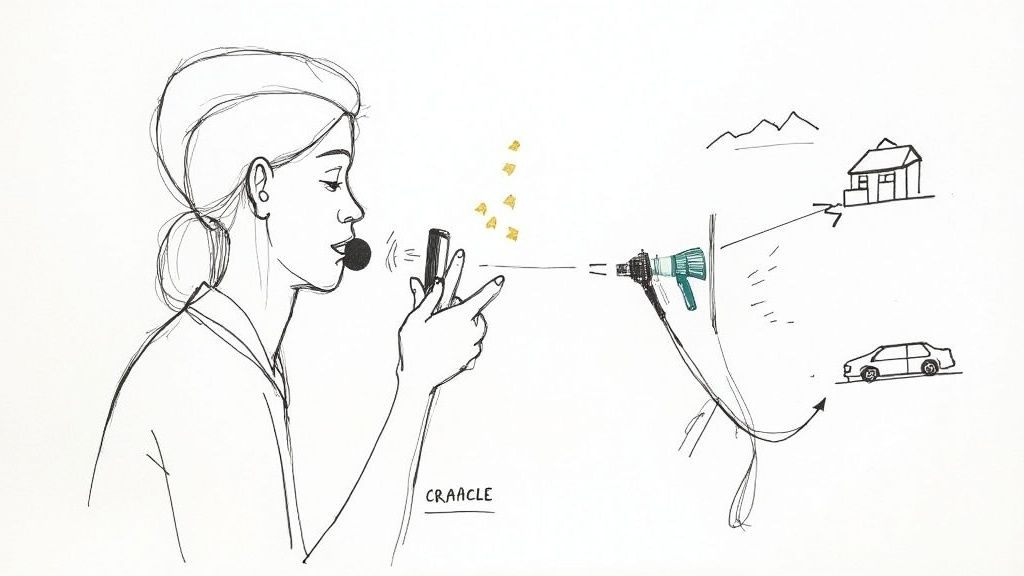
Let’s be blunt: your camera's built-in microphone isn't doing you any favours. It’s designed to hear everything, which means it captures your voice, the hum from the air con, the traffic outside, and your neighbour's dog barking, all with equal enthusiasm. To get audio that focuses on your subject, you need a more specialised tool.
Here’s a quick rundown of what you should be looking at:
Lapel Mics (Lavaliers or "Lavs"): These little guys are your best friend. They clip right onto your talent's shirt, getting the microphone just inches from their mouth. That proximity is their superpower. It means the voice is recorded much, much louder than any background chatter, giving you a fantastic signal-to-noise ratio. If you’re filming an interview on a busy street or a vlog in a bustling café, a lav mic is an absolute must-have.
Shotgun Mics: These are all about direction. A shotgun mic is designed to listen intently to whatever it's pointed at while actively ignoring sounds from the sides and back. You can mount one on your camera or, even better, on a boom pole just out of frame. It's brilliant for isolating dialogue from a short distance and cutting down on that echoey, empty-room sound.
It's Not Just the Mic, It's How You Use It
Having a decent microphone is only half the battle; where you put it is just as critical. The golden rule is simple: get the mic as close as you can to the person speaking without it creeping into the shot (unless, of course, it's a podcast or radio-style interview where seeing the mic is part of the look).
For a lavalier, aim for the centre of the chest, about 15-20 centimetres (or a hand's width) below the chin. Be careful it’s not rubbing against a collar or a necklace, as that rustling sound is a nightmare to edit out later. With a shotgun mic, always point it directly at the speaker's mouth, usually from slightly above and angled down. This gives you the clearest, most direct sound path.
A Quick Tip from the Field: Never, ever forget your windshield. A simple foam cover helps a lot indoors by taming those harsh "p" and "b" sounds (plosives). But for filming outside in the unpredictable British weather, a furry "deadcat" windshield is essential. Wind noise is one of the hardest, if not impossible, sounds to fix in post.
Tame Your Recording Space
The room you're in plays a huge role in your audio quality. Hard, flat surfaces are the enemy—think windows, wooden floors, and bare walls. They bounce sound waves all over the place, creating the echo and reverb that makes your audio sound distant and unprofessional.
But you don't need to build a professional studio. A bit of creative thinking can work wonders.
- Soften Everything: Grab some blankets, duvets, pillows, or even just some thick towels and drape them over any hard surfaces you can. Rigging a heavy blanket over a couple of chairs can create an surprisingly effective makeshift vocal booth.
- Pick Your Room Carefully: A living room with a carpet, curtains, and a big sofa will sound infinitely better than a tiled kitchen or bathroom. Soft furnishings are your friend because they absorb sound.
- Listen Before You Record: This might be the single most important tip. Before you hit that red button, just stop. Close your eyes and listen for a full 30 seconds. What do you hear? The faint hum of the fridge? The boiler kicking in? A computer fan whirring away? Deal with these things before you start recording. Turning them off for ten minutes is far easier than fighting them for hours in the edit.
Using AI for Effortless Audio Cleanup
When deadlines are breathing down your neck and you need a polished result without getting lost in the weeds of audio engineering, AI-powered tools are nothing short of a lifesaver. These clever algorithms can listen to your audio, figure out what's speech and what's noise, and then pull them apart with stunning accuracy. Think of it as your express lane to clean, professional-sounding audio.
Forget manually hunting down the hum of a fridge or the hiss from a computer fan. More often than not, you can fix an entire track with a single click. This technology has gotten so good and so accessible that it's now a standard feature in many of the video editing apps you're probably already using. It's the perfect solution for vloggers, social media managers, and anyone who needs to create great content, fast.
How Does the AI Magic Actually Work?
At its heart, AI noise reduction is just a very intelligent filter. The software has been trained on thousands of hours of audio, learning to tell the difference between the complex frequencies of a human voice and common background annoyances like traffic, wind, or an air conditioning unit. When you apply the effect, it basically creates a sonic fingerprint of the unwanted sound and subtracts it from your track, leaving the important dialogue behind.
The real breakthrough, though, is how it handles noise that changes over time – something traditional tools always struggled with. A sudden car horn, a passing siren, or a gust of wind can all be identified and dialled back without you needing to fiddle with settings every few seconds.
The Creator's Advantage: Using AI to remove background noise from videos isn't just a time-saver; it’s about protecting the quality of the voice itself. Older methods could leave dialogue sounding thin and robotic, but modern AI does a much better job of keeping the natural warmth and richness of the speaker’s tone.
One-Click Fixes Inside Your Favourite Video Editors
Many of the big names in video editing have built powerful, AI-driven audio tools right into their software. This is fantastic news because it means you don't have to break your workflow by exporting audio to a separate program, fixing it, and then bringing it back in. You can sort the sound out directly on your timeline.
Here’s where to find these features in a few popular editors:
- CapCut: Famous for its mobile-first approach, CapCut has a surprisingly effective "Noise reducer" function that works wonders on clips destined for social media.
- Descript: While it started as a transcription tool, Descript's "Studio Sound" feature is a one-click marvel that removes noise and enhances vocal quality at the same time.
- DaVinci Resolve (Fairlight): For those who want a bit more control, the Fairlight audio page in DaVinci Resolve has a "Voice Isolation" tool. It uses its own AI engine to cleanly separate dialogue from background noise with incredible results.
This integration is key to keeping your edit moving smoothly. You can slap the effect on, hear the result, and tweak it in real-time, all within the same environment you use for cutting your visuals.
A Practical Walkthrough with AI Denoising
Let's say you've just filmed a brilliant piece-to-camera in a local park. The shot looks great, but when you play it back, you realise the low rumble of distant traffic is a constant distraction. Even the most serene-looking green spaces in the UK can be acoustic traps. Filming in Greater London, for example, is a real challenge; a 2025 study found that 28% of its greenspaces exceed the WHO's recommended road noise limits, which rather spoils the peace creators are looking for. You can find out more about how urban noise affects UK environments in the full University of Leicester report.
Instead of ditching the shot, this is the perfect time to call on an AI tool. A platform like SoReel offers a streamlined, one-pass workflow that can sort out multiple problems at once. You just upload your video, and the AI not only reduces the background noise but can also level out your volume and boost vocal clarity, spitting out a platform-ready file in minutes. For creators juggling lots of projects, looking into the different SoReel pricing tiers can provide solutions that grow with your output.
The process is refreshingly straightforward:
- Upload Your Clip: Drag and drop your video file straight into the web-based tool.
- Let the AI Do Its Thing: Choose the audio enhancements you need, like noise reduction and voice clarity.
- Process and Download: The AI gets to work, cleaning up the audio track automatically. Once it’s done, you can download the improved video, ready to go.
This hands-off approach is ideal for anyone who values speed and efficiency but isn't willing to compromise on audio quality. It’s a massive step up from the tedious, manual methods of the past and makes professional-sounding audio something everyone can achieve.
Advanced Techniques for Precision Audio Repair
AI tools are brilliant for a quick fix, but what happens when the problem needs a more delicate touch? Sometimes, an automated process just can't tell the difference between a crucial bit of dialogue and a sudden, sharp noise. This is when you need to roll up your sleeves and take manual control, moving from broad-strokes cleanup to surgical audio repair.
These advanced methods are your secret weapon for rescuing an otherwise perfect take. They let you visually pinpoint and eliminate specific, isolated sounds that automated systems might miss or, worse, completely mangle. We’re talking about that sudden dog bark, a squeaky chair during an important interview, or a phone notification pinging at the worst possible moment.
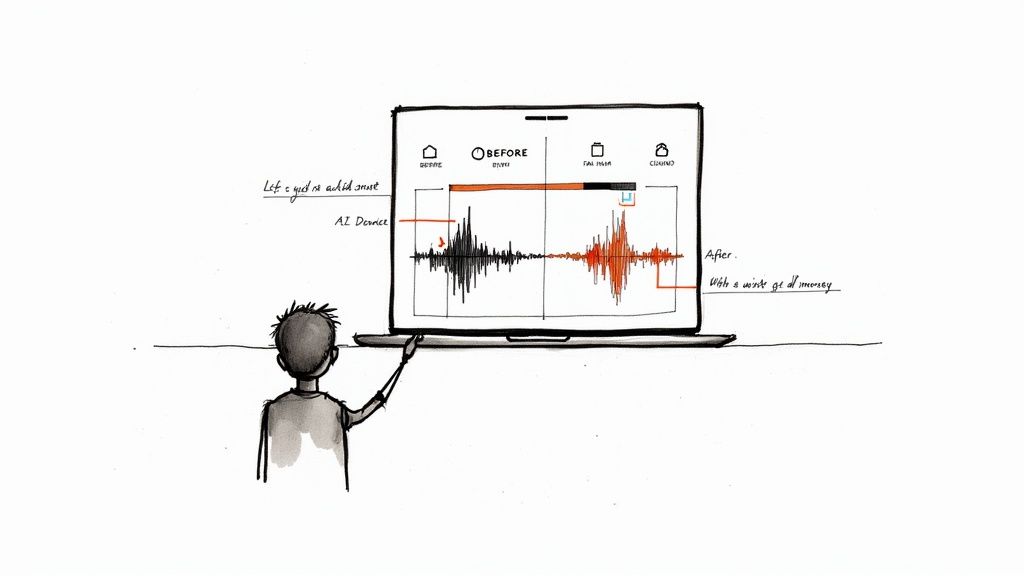
The image above gives you a good idea of what noise reduction does to a waveform—the unwanted background is smoothed out, leaving the main dialogue peaks intact. With manual tools, you gain the power to perform this kind of precise cleanup yourself, with far more control.
Diving into Spectral Repair
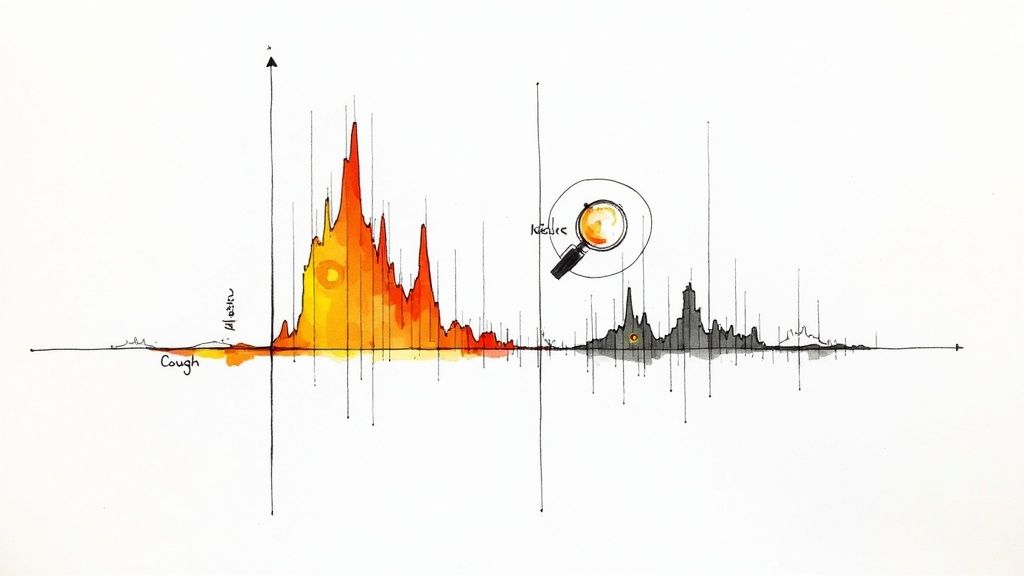
Imagine if you could actually see sound. That’s exactly what a spectral frequency display, or spectrogram, lets you do. Instead of a simple waveform showing volume over time, a spectrogram visualises frequency. Bass tones live at the bottom, treble is at the top, and brighter colours mean louder sounds. This visual map is the key to spectral repair.
In this view, a sudden cough or a door slam shows up as a distinct visual blotch or spike. Using a spectral repair tool, you can literally draw a box around that unwanted sound and tell the software to remove or replace it. The software then intelligently analyses the surrounding audio to fill the gap, often making the edit completely seamless.
This technique is incredibly powerful for dealing with:
- Sudden, short noises: Think clicks, pops, coughs, or sneezes.
- Persistent hum or whine: The classic 50 Hz mains hum common in UK buildings appears as a bright, steady horizontal line you can easily select and erase.
- Mobile phone interference: That awful dit-dit-dit-diddit sound creates a unique visual pattern that can be surgically removed.
Mastering the Equaliser for Tonal Shaping
While spectral repair is for zapping individual sounds, an equaliser (EQ) is your tool for shaping the overall tonal balance of your audio. An EQ lets you boost or cut specific frequency ranges, making it perfect for tackling persistent, wide-spectrum noise that’s blended in with your main audio.
Think of it as a highly advanced set of bass and treble controls. You can use it to carve out problematic frequencies without making the dialogue sound thin or unnatural—a far more nuanced approach than a simple noise reduction slider.
Urban environments are a major headache for UK creators. A 2025 poll found that 54% of city residents believe their surroundings have got noisier over the past five years. For anyone recording at home, this means a constant battle against traffic and background chatter. You can read more in the Chartered Institute of Environmental Health survey.
Real-World Scenario: You’ve recorded an interview in a café. The dialogue is clear, but there’s a constant low-end rumble from street traffic and the espresso machine. A simple noise gate might chop off words, and a broad AI tool might thin out the voice. This is where an EQ is the perfect solution.
A Practical EQ Workflow
To get rid of that café rumble, you’d reach for a high-pass filter. Just as the name suggests, this filter lets all the high frequencies "pass" through while cutting out the low ones.
- First, open a parametric EQ on your audio track. This type gives you the most control over the sound.
- Next, find and activate the high-pass filter (sometimes called a low-cut).
- Start by setting the frequency around 80 Hz. This is a safe starting point that will attack the deepest rumble without touching the body of most human voices.
- Now, listen and adjust. Slowly sweep the frequency upwards. You’ll hear the rumble disappear. The trick is to stop as soon as it’s gone. If you push it too high (say, above 150 Hz for a deep male voice), the dialogue will start to sound thin and tinny.
You can use the same logic with a low-pass filter to roll off any high-pitched hiss from an air conditioner or a noisy camera preamp. By carefully sculpting the sound with an EQ, you can dramatically improve clarity and remove background noise from videos in a way that sounds completely natural.
Finalizing and Exporting Your Clean Video Audio
You've put in the hard work—meticulously filtering, repairing, and polishing your audio. Now it’s time for the final, crucial stage: preparing your audio for the world. This is where you package everything up, ensuring your video sounds just as brilliant on a phone speaker as it does through a good pair of headphones.
Think of this as the mastering phase. We're no longer fixing problems. Instead, we're applying that final professional sheen and making sure the audio meets the technical standards for platforms like YouTube or Instagram. Skipping this can undo all your noise-reduction efforts, so let's get it right.
First, Normalise Your Audio Levels
We’ve all been there. You're watching a playlist, and one video is barely a whisper while the next one blasts your eardrums. That jarring experience is exactly what audio normalisation prevents. It’s the simple process of setting your entire track's volume to a consistent, standard level.
Most online platforms have a target loudness, which is measured in LUFS (Loudness Units Full Scale). Hitting this target ensures a smooth experience for viewers.
- YouTube: Generally targets an integrated loudness of -14 LUFS.
- Spotify & Apple Podcasts: Often sit around -16 LUFS.
For most video work, aiming for -14 LUFS is a solid bet. Just about every video editor has a normalisation tool. All you do is plug in your target LUFS value, and the software handles the rest, raising or lowering the gain to hit that mark. This makes sure your video is loud and clear without ever distorting.
Key Insight: Normalisation isn't just about cranking up the volume. It's about hitting a professional, predictable loudness standard so your audience isn't constantly reaching for their volume control.
Use a Touch of Compression for a Balanced Sound
While normalisation sets the overall volume, a compressor tames the dynamic range—the gap between your audio's loudest and quietest moments. Human speech is naturally dynamic; we whisper, we project, we emphasise certain words.
A compressor works by automatically turning down the loudest peaks. This lets you then bring up the overall volume without the loud parts clipping, making the quieter sections much easier to hear. The end result is a more balanced, even sound where every single word is intelligible.
This is absolutely essential for mobile viewing. Think about it: your audience is likely watching in a busy cafe or on public transport. A little bit of gentle compression ensures that even the quietest dialogue isn't drowned out by their surroundings.
Choose the Right Export Settings
This is the final handshake. Your export settings lock in all your hard work. Get these wrong, and you can accidentally introduce weird digital artefacts that make your clean audio sound cheap and nasty.
Here are the settings I stick to for crisp, platform-ready audio.
- File Format: Your audio will be wrapped inside a video container, usually .MP4. The key thing is the audio codec inside it. AAC (Advanced Audio Coding) is the undisputed champion for online video—it gives you fantastic quality without bloating your file size.
- Sample Rate: Keep it simple: 48 kHz. This is the professional standard for video and guarantees it will play nice with pretty much any device or platform.
- Bitrate: This controls the audio data's detail. For most online videos, a bitrate of 192 kbps is the sweet spot between quality and file size. If you're working on something where audio is the absolute star of the show—like a music performance or a high-end documentary—you can push it to 320 kbps.
By taking these final steps, you're not just exporting a file; you're guaranteeing that the clean, professional audio you crafted is exactly what your audience gets to hear, no matter how or where they watch.
Got Questions About Audio Cleanup? We’ve Got Answers
Even with the best tools in your arsenal, you're bound to hit a few snags or have some questions pop up. Let's walk through some of the most common queries I hear from creators learning how to remove background noise from their videos. Getting these down will help you refine your workflow and tackle problems like a pro.
Can I Actually Get Rid of All the Background Noise?
This is the big one, and the honest answer is usually no—but that's not a bad thing. While the latest AI tools are incredibly impressive, the real goal here is noise reduction, not total, sterile silence.
When you push a denoiser too hard and try to obliterate every last sound, you often end up with dialogue that sounds thin, watery, or just plain weird. A little bit of the room's natural tone or some subtle ambience actually sounds much more natural to our ears than a dead-silent void. Your mission should be to dial back the distracting noise just enough so that the dialogue can take centre stage.
What’s the Best Free Software for Cleaning Up Audio?
You don't need to break the bank to get clean audio. There are a couple of standout free options that can deliver seriously professional results.
- DaVinci Resolve: This is an absolute beast. The built-in Fairlight audio page is a full-blown digital audio workstation, and its AI-powered noise reduction is fantastic, especially for consistent sounds like air-con hum or traffic rumble.
- Audacity: As a dedicated audio editor, Audacity offers a more classic, hands-on approach. Its "Noise Reduction" effect is a two-step process: you feed it a "noise profile" (a clean sample of just the background noise), and it uses that to surgically remove it from the rest of the track. It takes an extra step of exporting and re-importing, but the control is top-notch.
Either of these is a brilliant place to start if you're looking to level up your audio game without spending a penny.
A Pro Tip From the Trenches: Don't just trust your ears, especially if you're editing in a noisy environment. Always use a good pair of headphones and keep an eye on your audio meters. This combination ensures you're cutting out the bad stuff without accidentally carving chunks out of the dialogue.
For a deeper dive into common issues, our team has put together a huge list of answers. You can explore more in our comprehensive FAQ section.
How on Earth Do I Fix Wind Noise?
Ah, wind. The arch-nemesis of every outdoor shooter. It's a nightmare to fix later because it creates a chaotic, low-frequency rumble that just smothers everything else. This is one area where prevention is always better than a cure.
Your number one defence is physical. Always use a "deadcat" (that furry thing) on your microphone when filming outside. Seriously, this little piece of fluff is non-negotiable and will save your audio countless times.
If you're already back in the edit suite with windy footage, your best bet is an equaliser (EQ).
- Slap a high-pass filter (sometimes called a low-cut) onto your audio track.
- Start with the filter set somewhere around 80-100 Hz.
- Now, slowly drag the frequency up while listening intently. You should hear that horrible low rumble start to vanish.
- Be careful! If you push it too high, the speaker's voice will start to sound thin and tinny. Stop the moment the wind becomes less distracting.
For truly catastrophic wind that an EQ can't tame, a spectral repair tool is the last-ditch, surgical option.
Do I Really Need to Use Headphones for Audio Editing?
Yes. One hundred percent. Without a doubt. Editing audio without proper headphones is like trying to colour-grade a video on an old black-and-white TV. You're flying blind.
Your laptop speakers are liars. They often can't reproduce the very low-end rumble or the subtle high-pitched hiss that you're trying to eliminate. You might not even realise a problem exists.
A decent pair of closed-back studio headphones will do two crucial things for you:
- Isolate the sound: They block out the noise in your room, so you're only hearing what's in your project.
- Reveal the details: They let you hear all the tiny imperfections—the faint hum, the quiet clicks, the exact texture of the noise you need to remove.
Honestly, investing in a good pair of headphones is probably the single biggest step you can take to immediately improve your audio editing.